How to run a docker container on a server
You can leverage the power and flexibility of Opscode's Chef cookbooks to configure software on servers deployed with the Multi-Cloud Orchestrator. Should you come across configuration errors, the Multi-Cloud Orchestrator also enables you to debug and fix them.
- Write and upload a cookbook
- Create a template that uses a custom cookbook
- Create a server that uses the template
- Debugging and fixing software configuration errors
- Additional Resources
Prerequisites
The only prerequisite is a simple custom cookbook that runs a docker container. The Multi-Cloud Orchestrator leverages Chef technology, allowing you to write and use modular and parametrized recipes to specify how to install and configure software on your servers. We will not cover cookbook development in this knowledge base; instead, for this example you will be using one that you can download from here; but extensive documentation on this topic can be found at https://docs.chef.io/cookbooks/.
Write and upload a cookbook
Once you have downloaded or written a very simple custom cookbook that runs a docker container:
- Go to Blueprint -> Cookbooks.
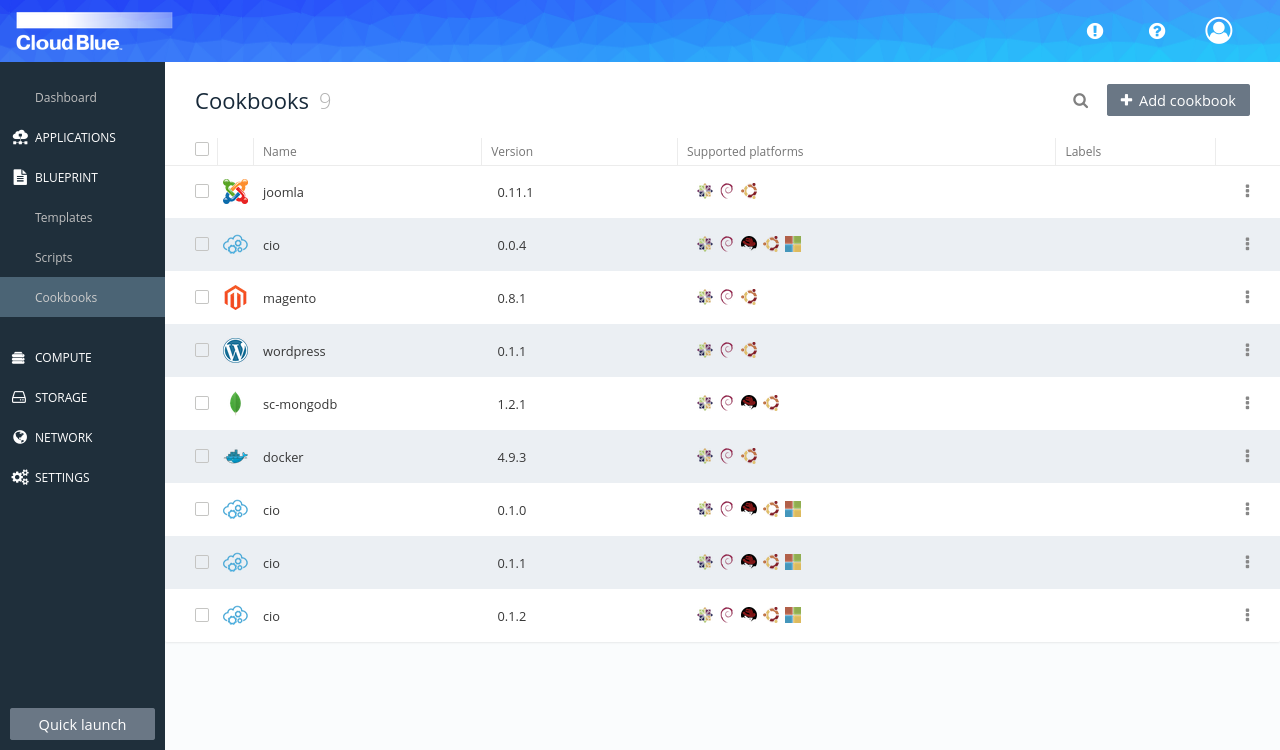
- Press the "Add Cookbook" button. Press "Upload cookbook" and select the custom cookbook.
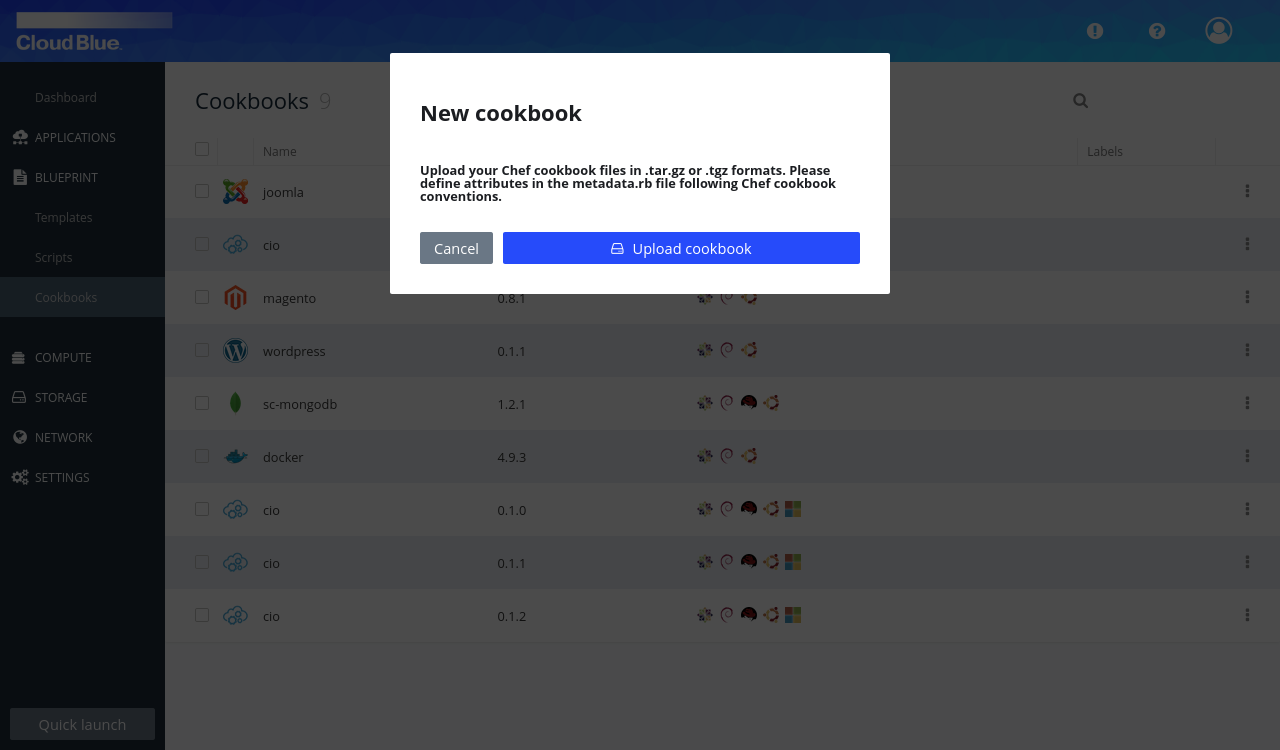
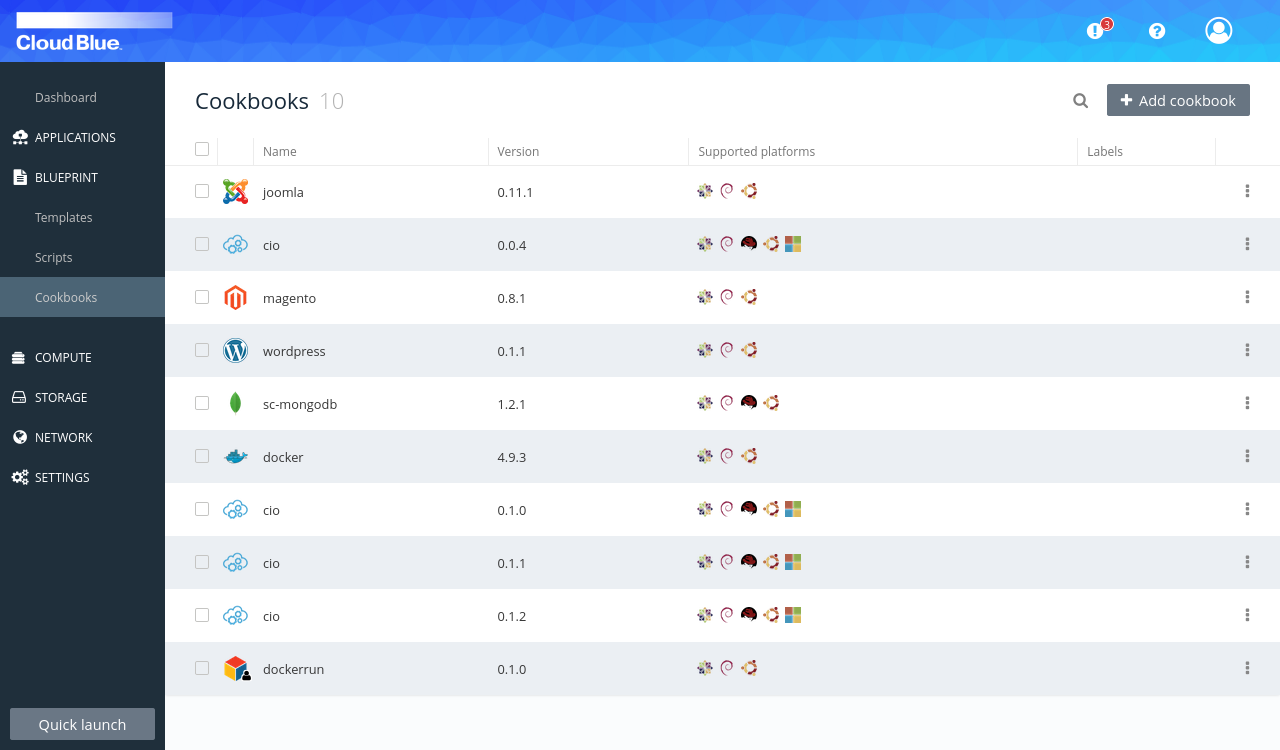
- The cookbook will be processed and in a few seconds it should appear at the end of the cookbook list.
 If your cookbook ends up in an error state, there may have been some errors processing it. Make sure your cookbook bundles a
 metadata.jsonfile, asmetadata.rbfiles are explicitly ignored due to security concerns. > If your cookbook does not bundle ametadata.jsonfile, you may generate it from a terminal using Opscode ChefDK command knife. The specific command you can use to generate the file isknife cookbook metadata my_cookbook -o path/to/cookbookswith my_cookbook replaced with the name of your cookbook and path/to/cookbooks replaced with the path under which your cookbook directory is.
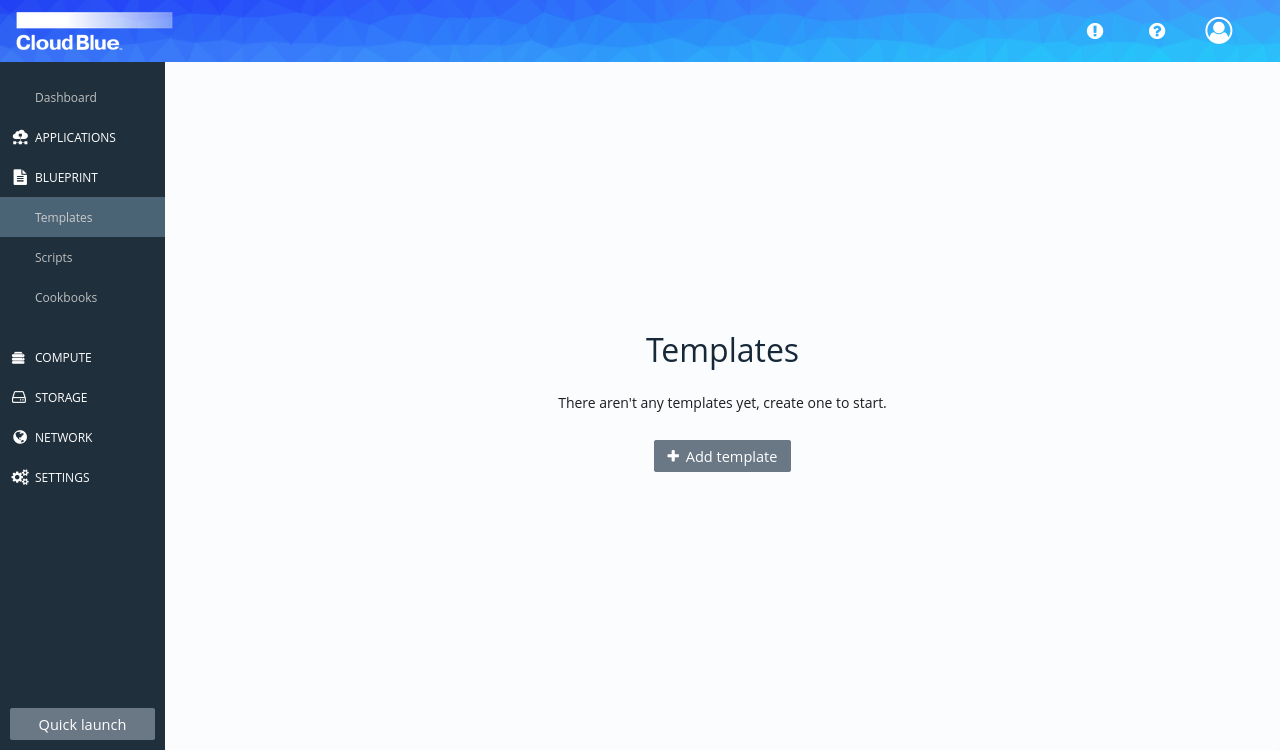
Create a template that uses a custom cookbook
- Go to Blueprint -> Templates.
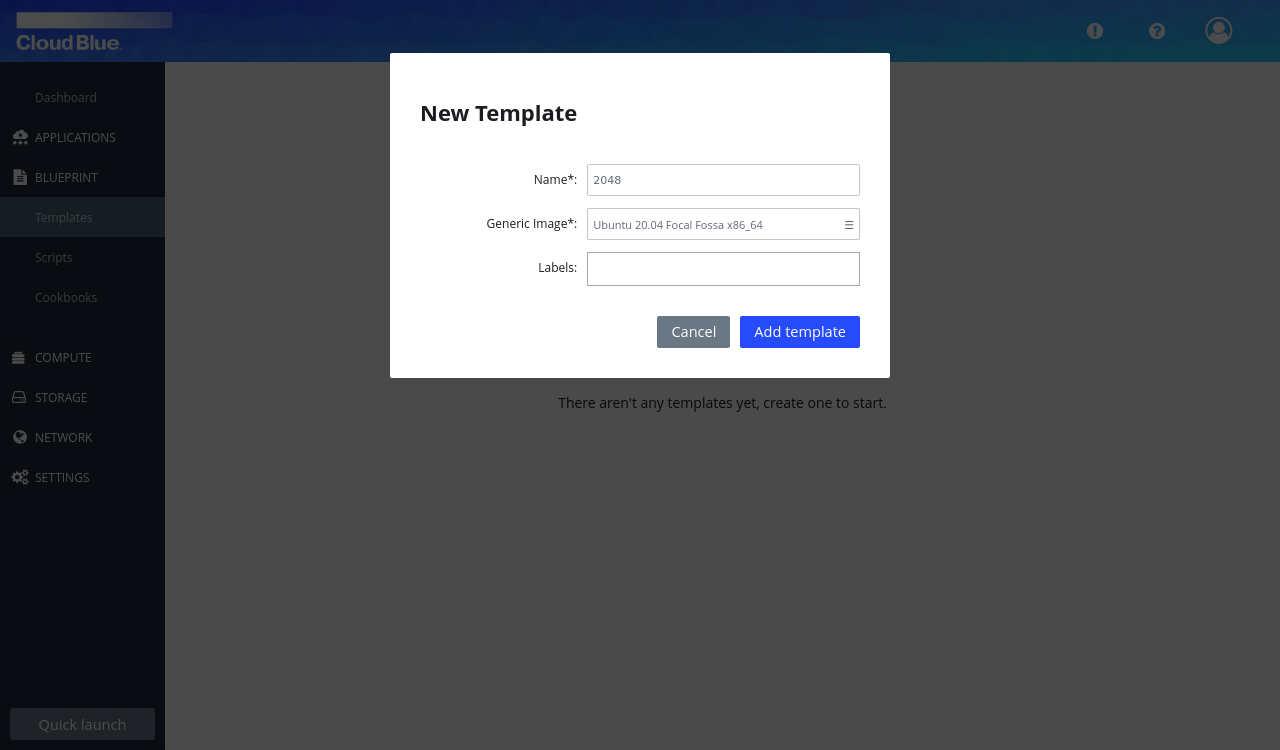
- Press the "Add template" button. Fill in the form with a Name for your template, select Ubuntu 20.04 Focal Fossa x86_64 as Generic Image and press the "Add template" button to create the template.
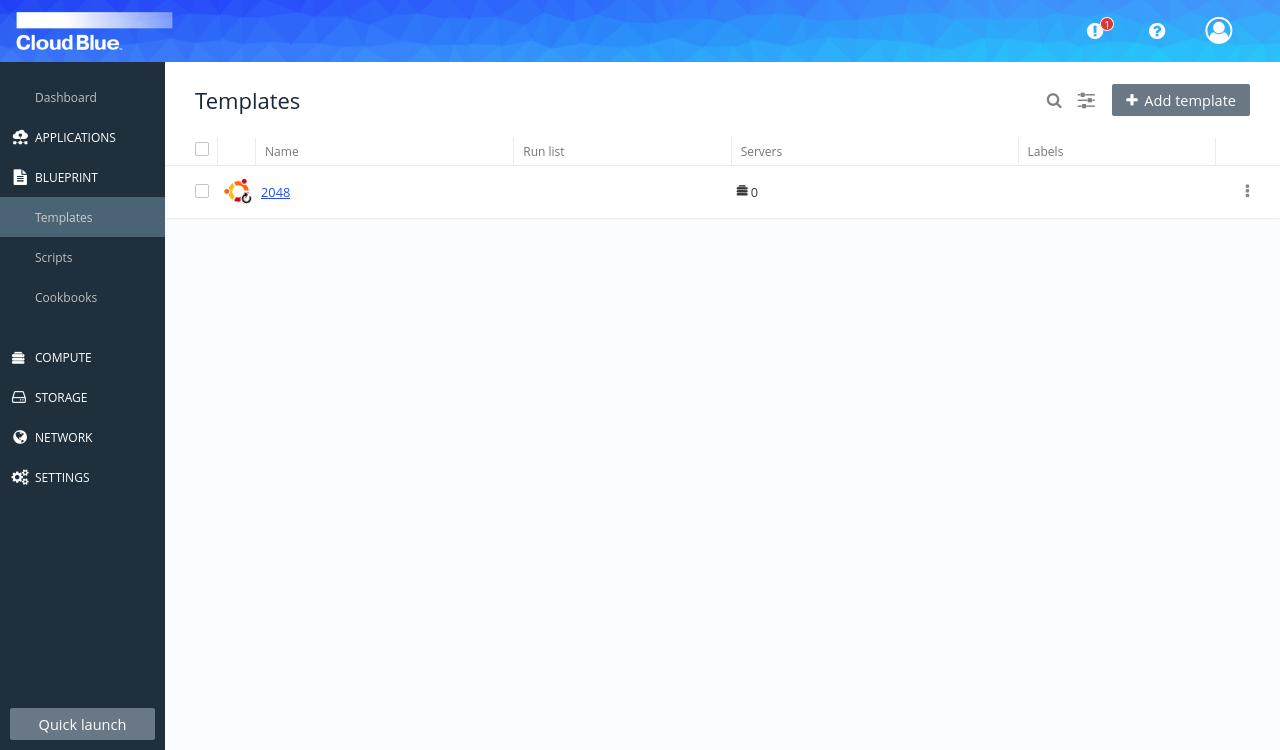
- In the templates table, click on the name of the template.
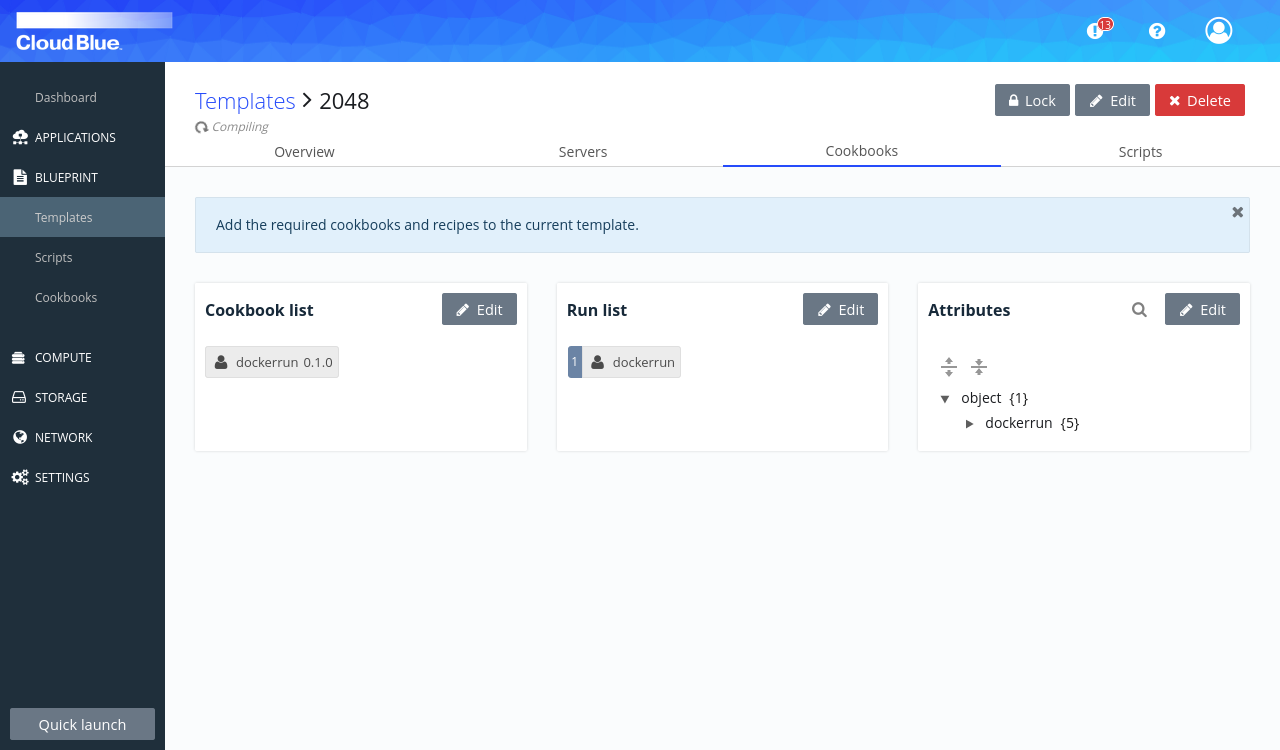
- Go to the Cookbooks tab
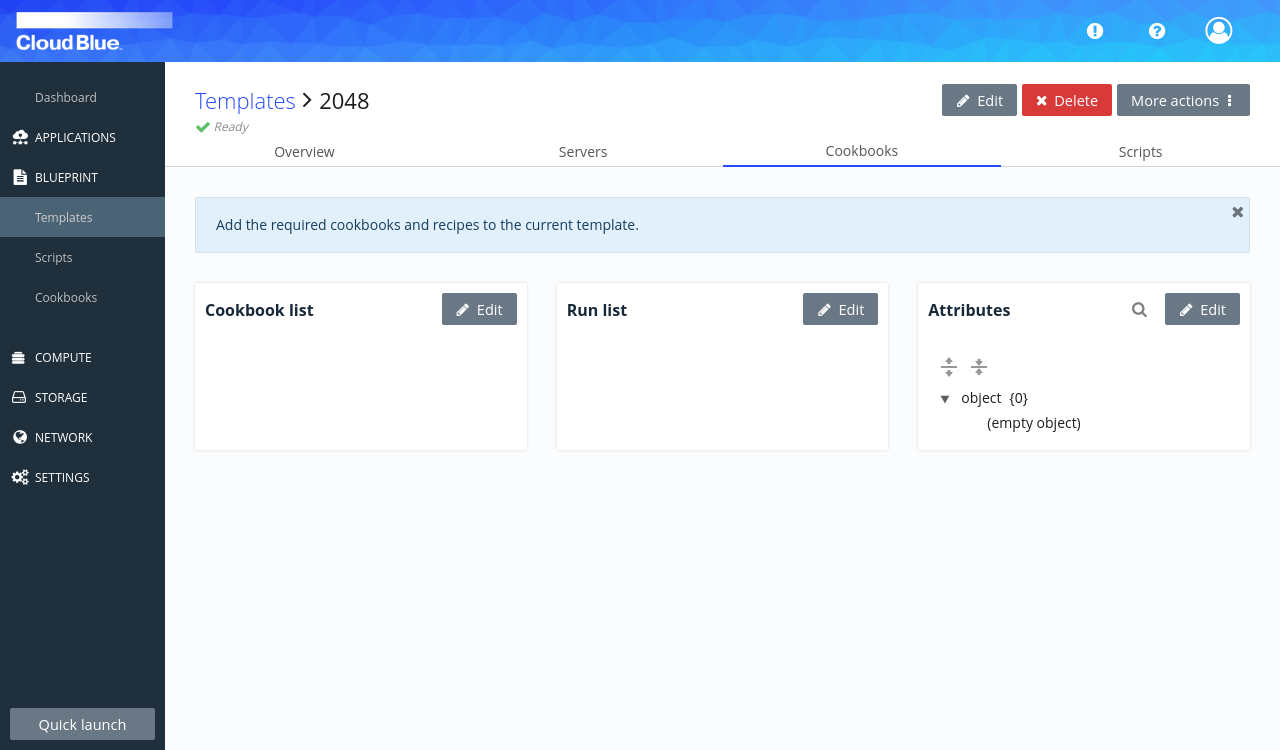
- Now in order to configure the use of the cookbook in the template, press the "Edit" button in the Cookbook list or Run list sections.
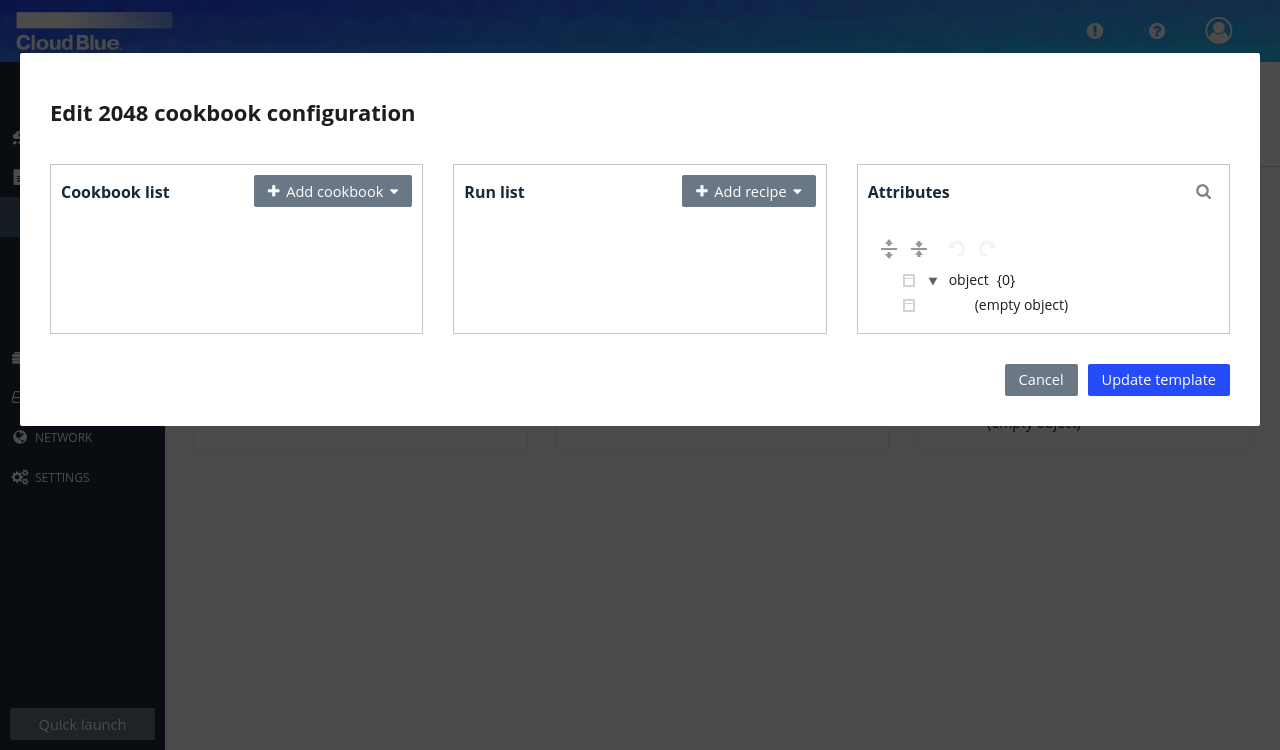
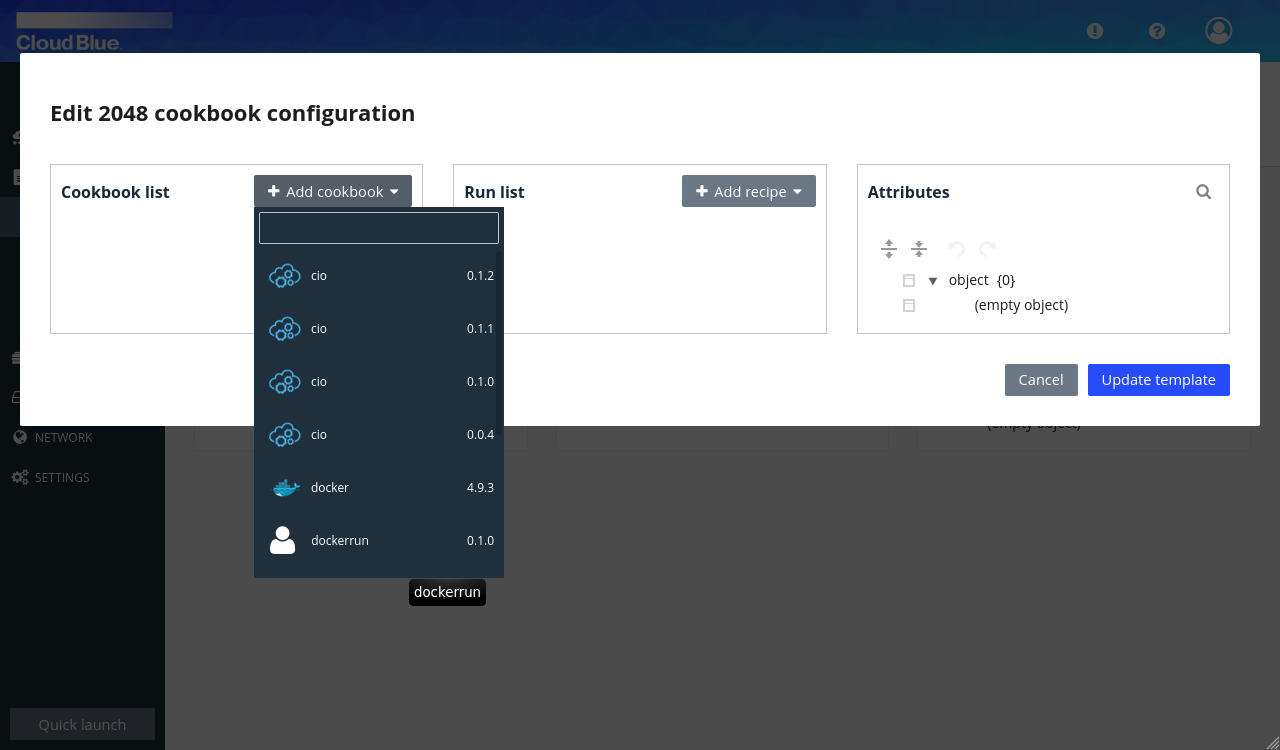
- In the opening dialog, press "Add cookbook" and select the custom cookbook as source for template recipes that can be applied.
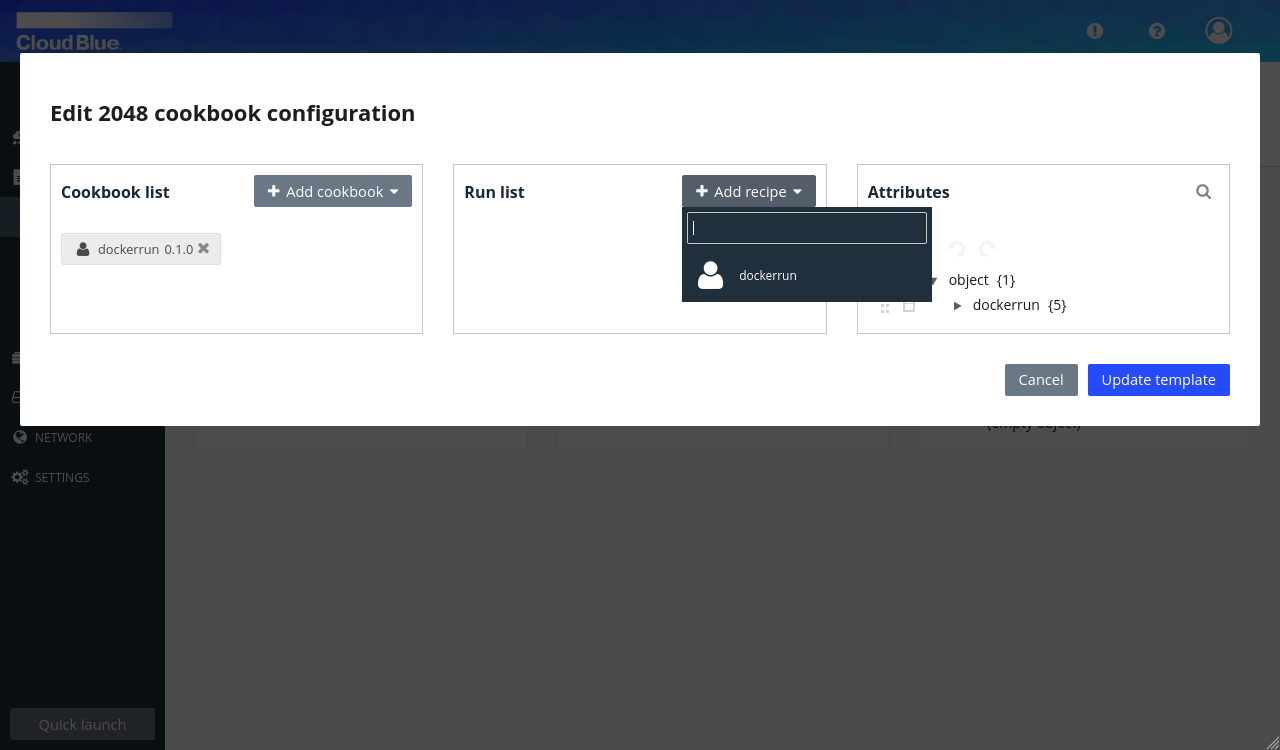
- Press "Add recipe" and select the recipe in the cookbook you want the template to apply. If the recipe you are looking for is missing, it may be possible that you have forgotten to declare it in the cookbook's metadata.json file.
- Now you should edit the attributes that parametrize your cookbook recipes. If your cookbook declares its attributes in its bundled metadata.json file, you should see the attributes for it in the attributes tree: you can expand it by pressing the triangular arrows. Otherwise you can build the attribute tree you need by appending the right properties of the right types using the actions in the menu under the square that precedes each element or the empty objects / arrays.
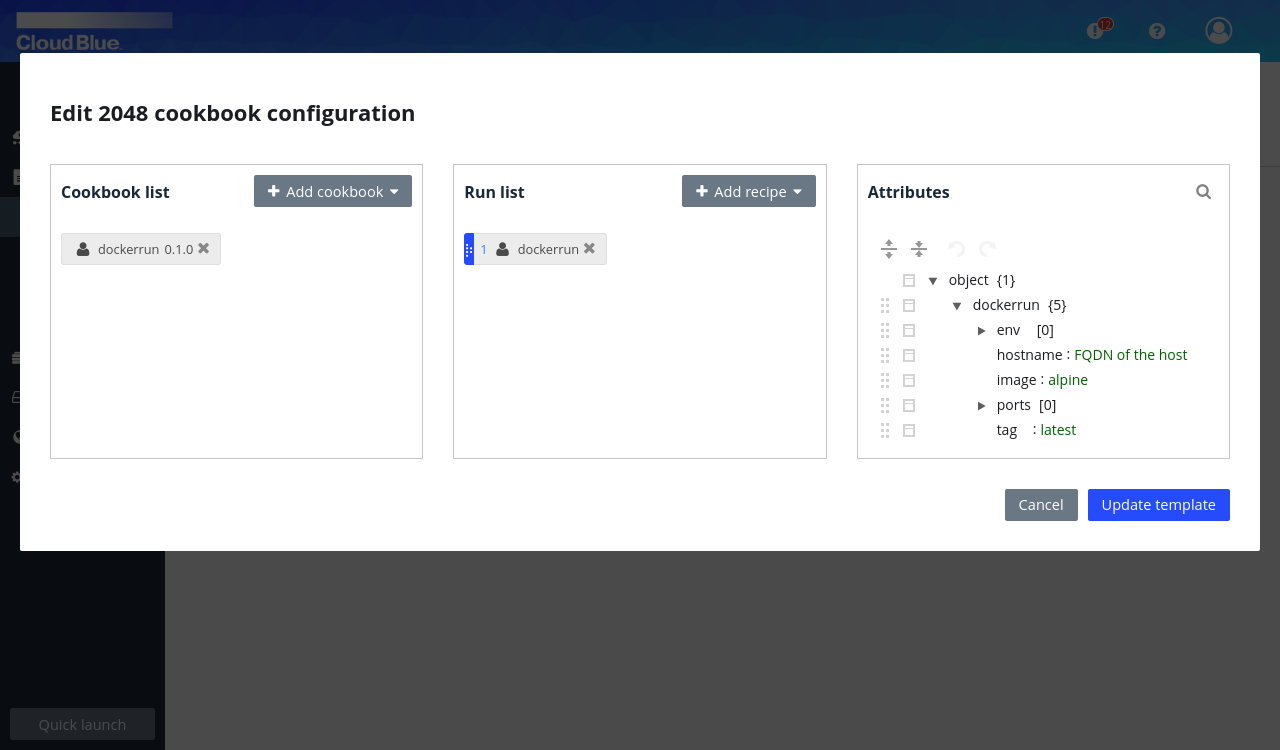
- For this example you should
- Set the value of the
imageattribute toalexwhen/docker-204, - Add the string
80:80to the ports array. In order to do this, click on the square that precedes the (empty array) under ports, then select open up the Append menu by click on its triangular arrow and select String.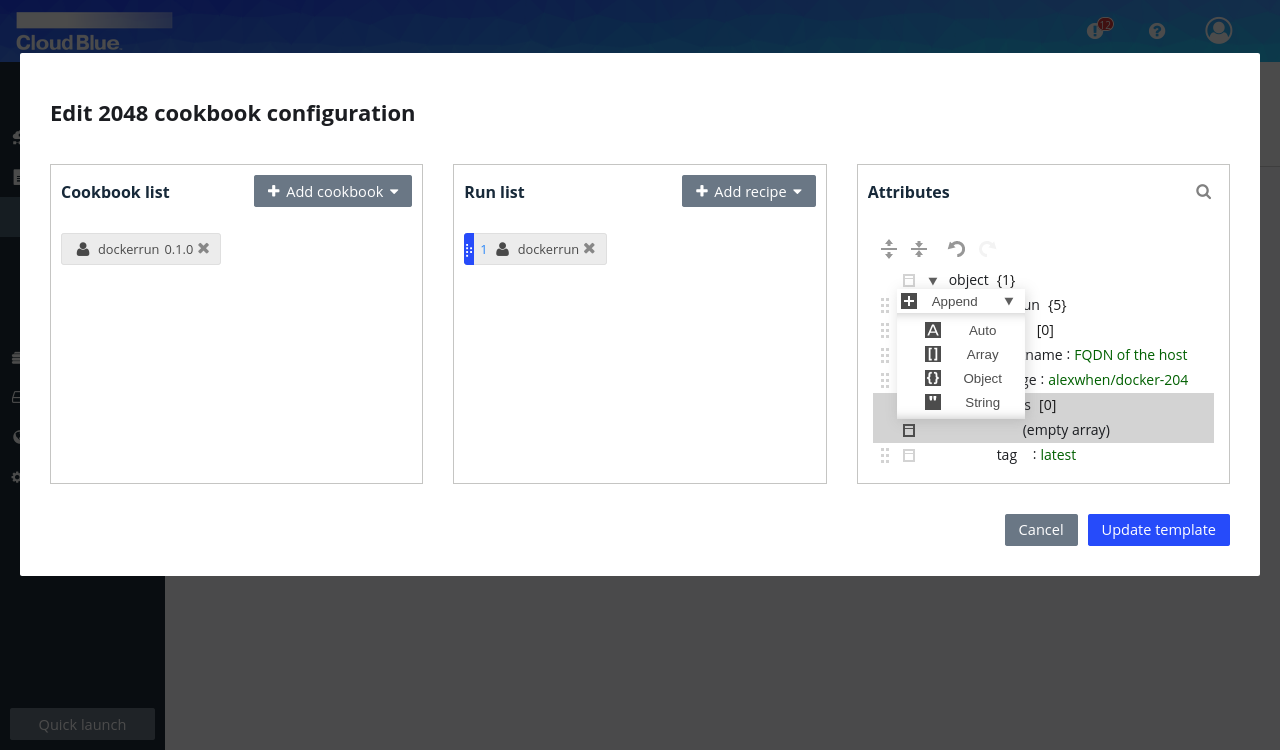 In the new value of the array, type the value in.
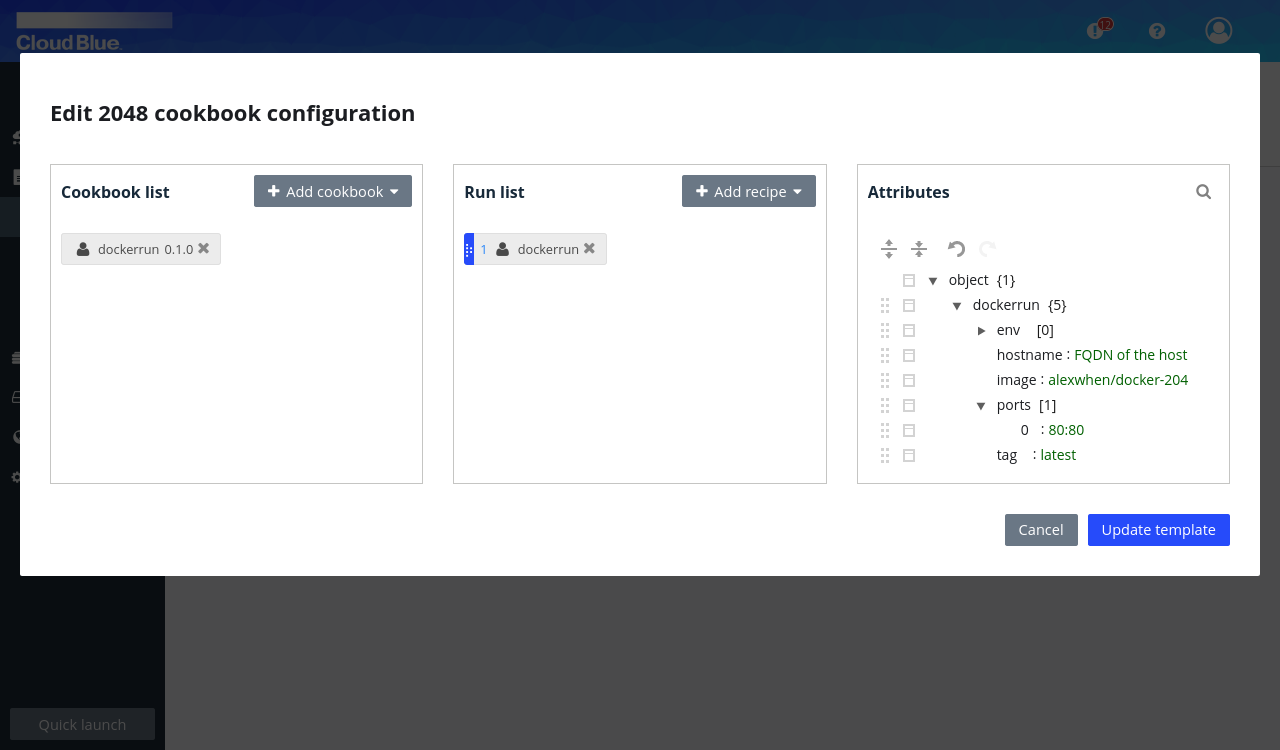
- Set the value of the
- Finally, press the "Update template button".
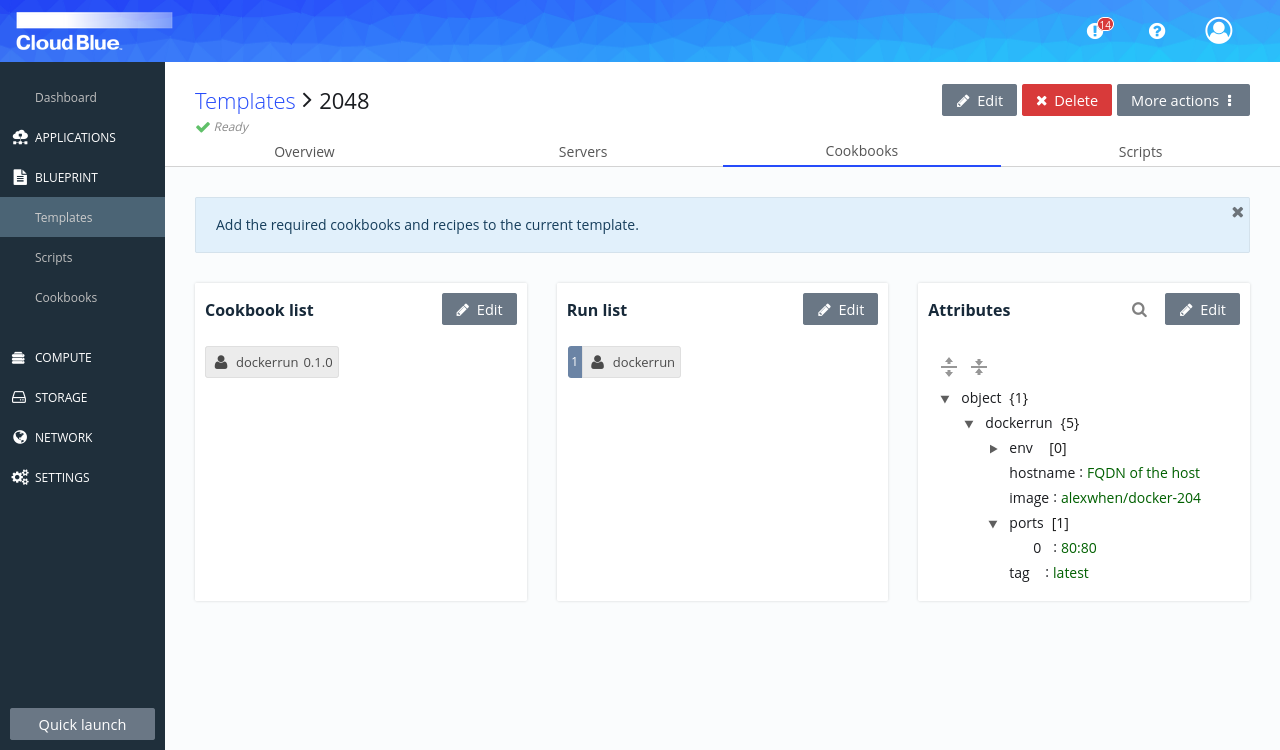
 The template will be recompiled and if no errors occur you can proceed to use it to deploy a server.
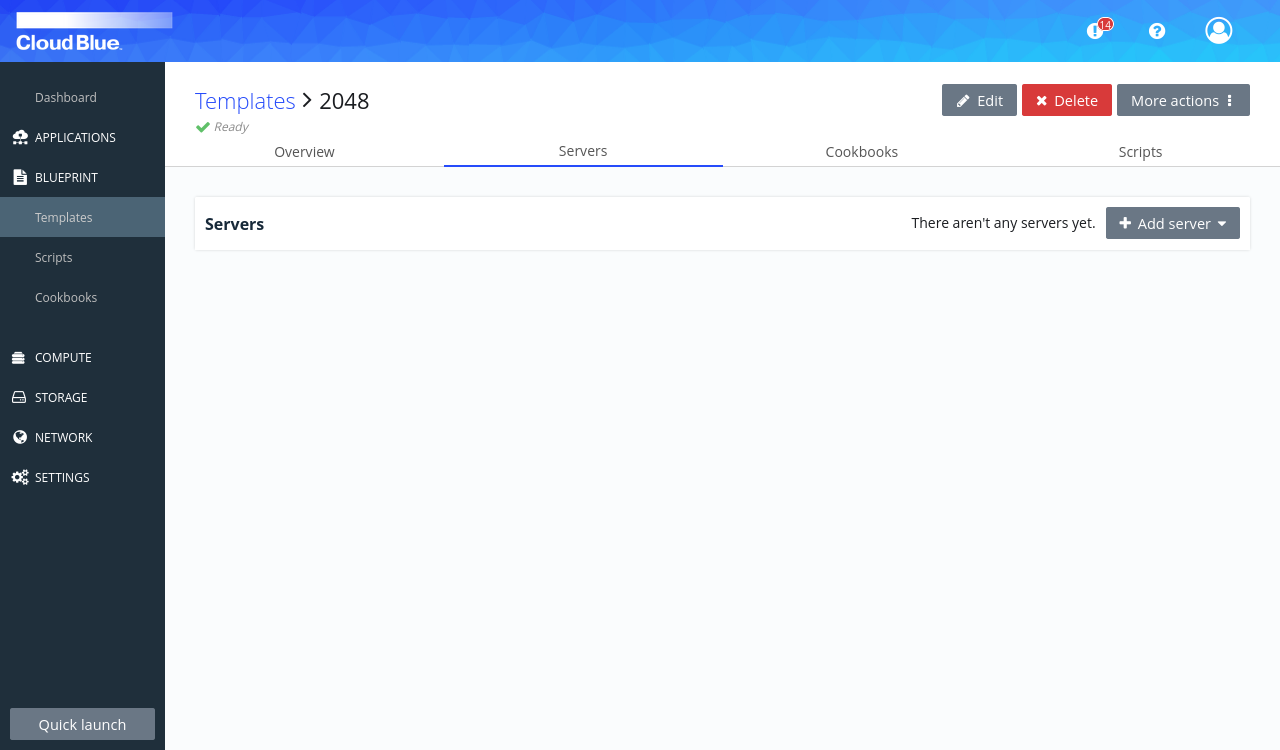
Create a server that uses the template
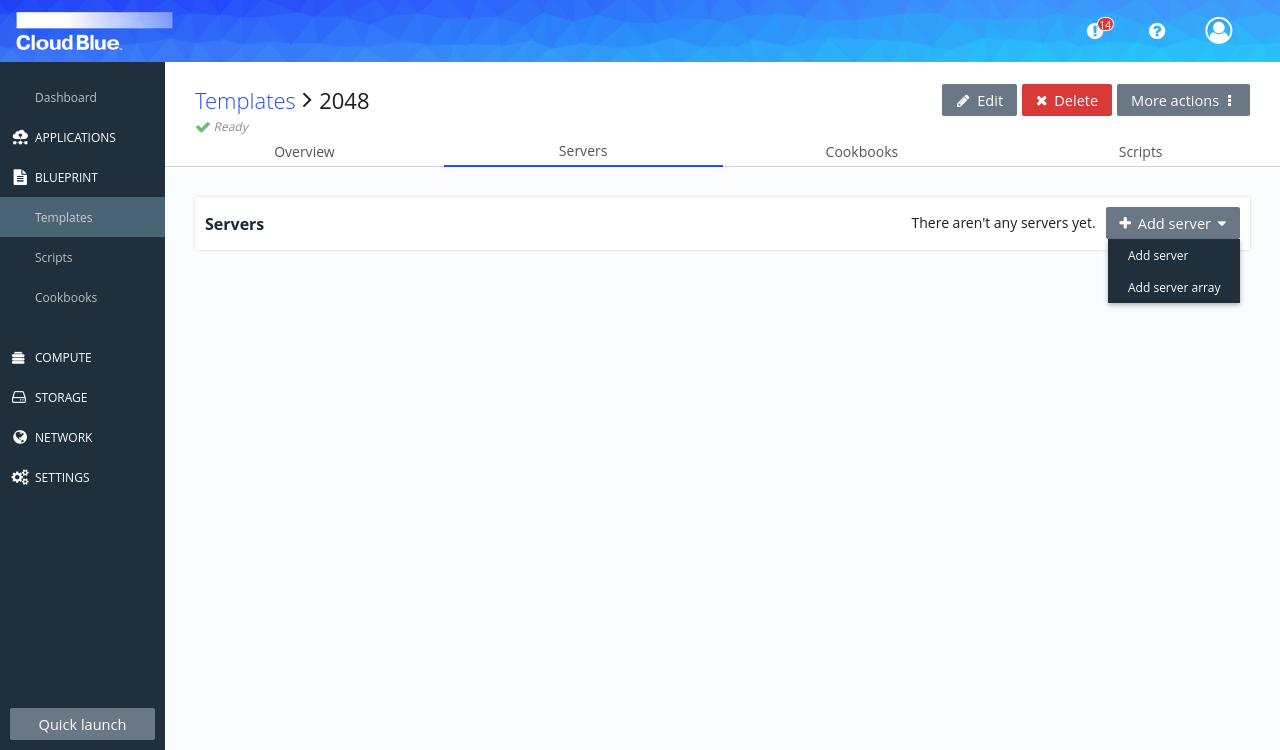
- Go to the Servers tab.
- Press the "Add server" button and then select "Add server".
- Fill in the opening form:
- Type in a name for your server,
- Do not select a VPC,
- Select a cloud account and the zone where you want to deploy the server,
- Select a server plan,
- Select the Default firewall as Firewall Profile,
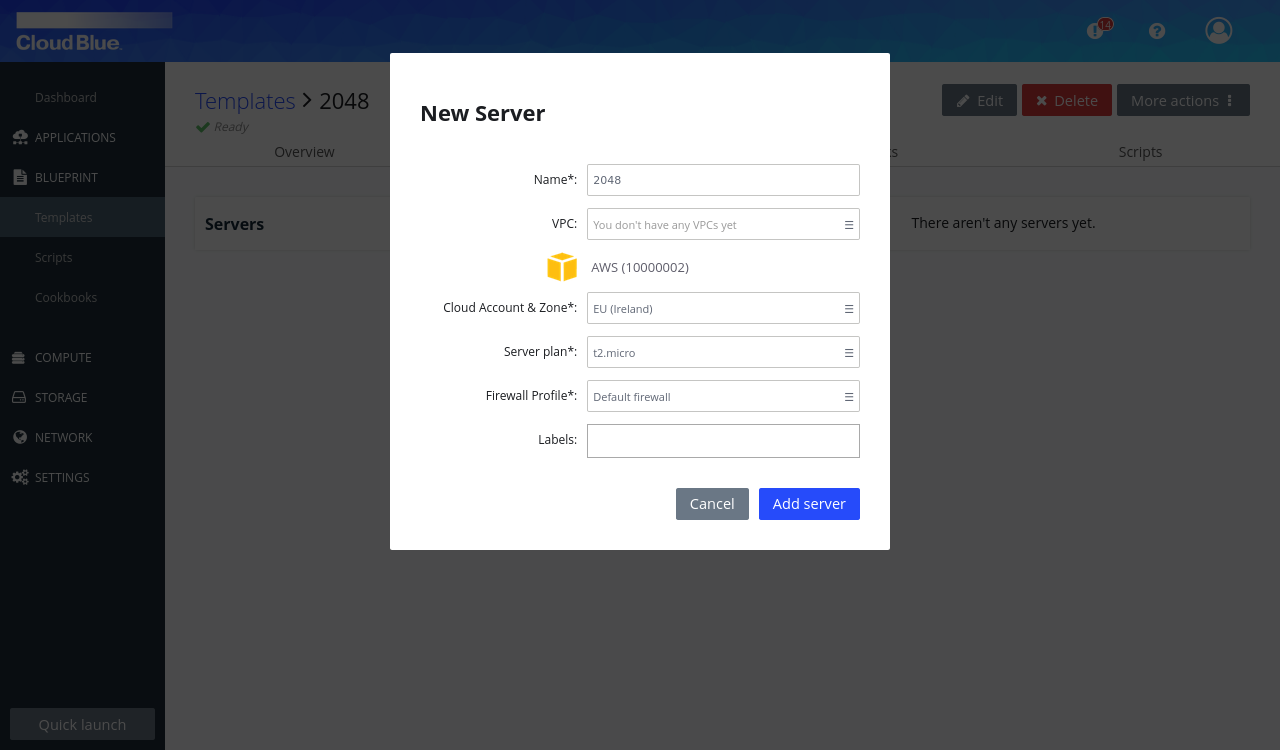
- Press the "Add server" button to create the server.
- Wait for your server status to become inactive and then press on the "Boot" action for the server.
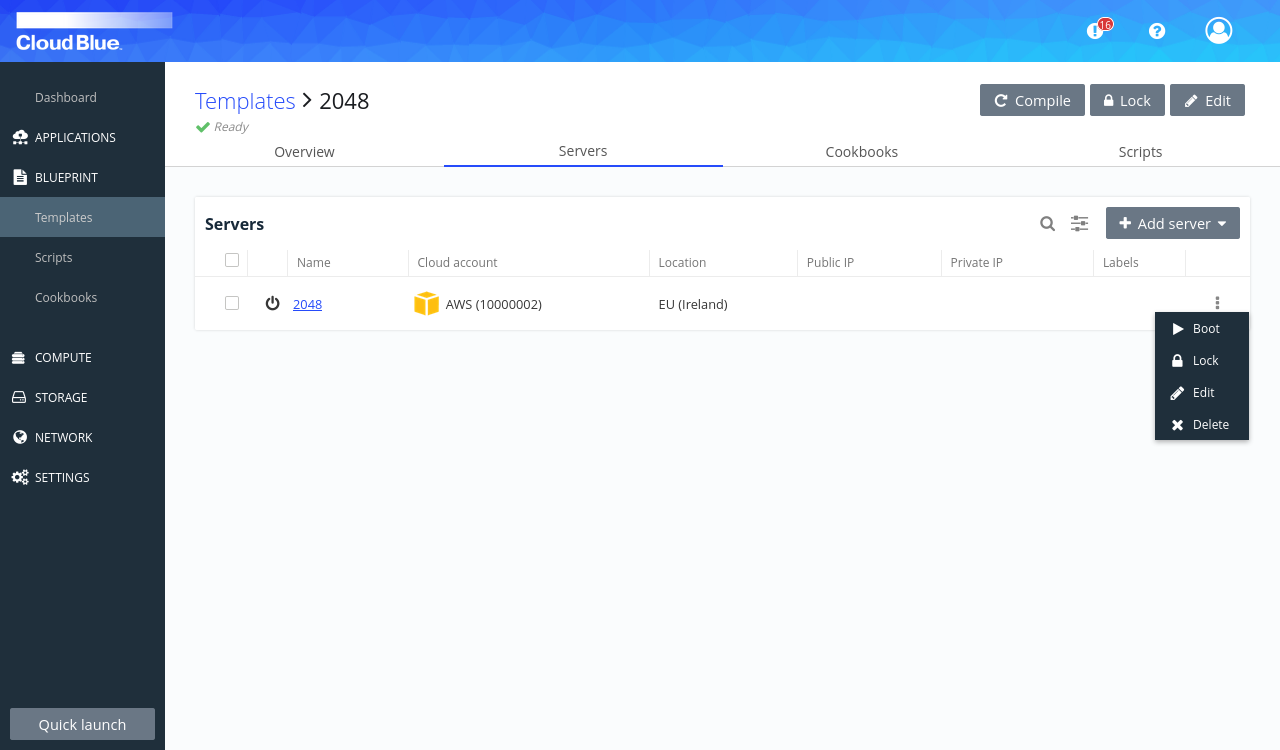
- The server will start booting.

- And then it will proceed to the bootstrapping state, during which software configuration is applied.
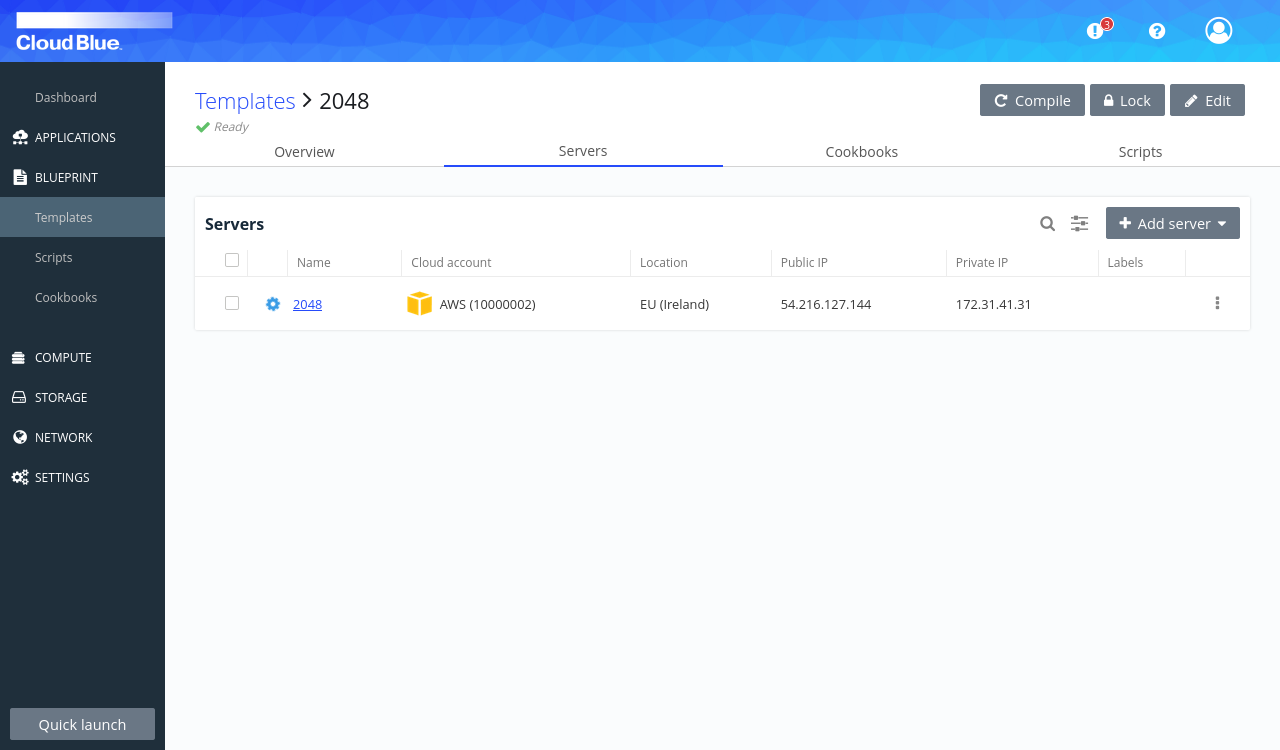
- Click on the server name.

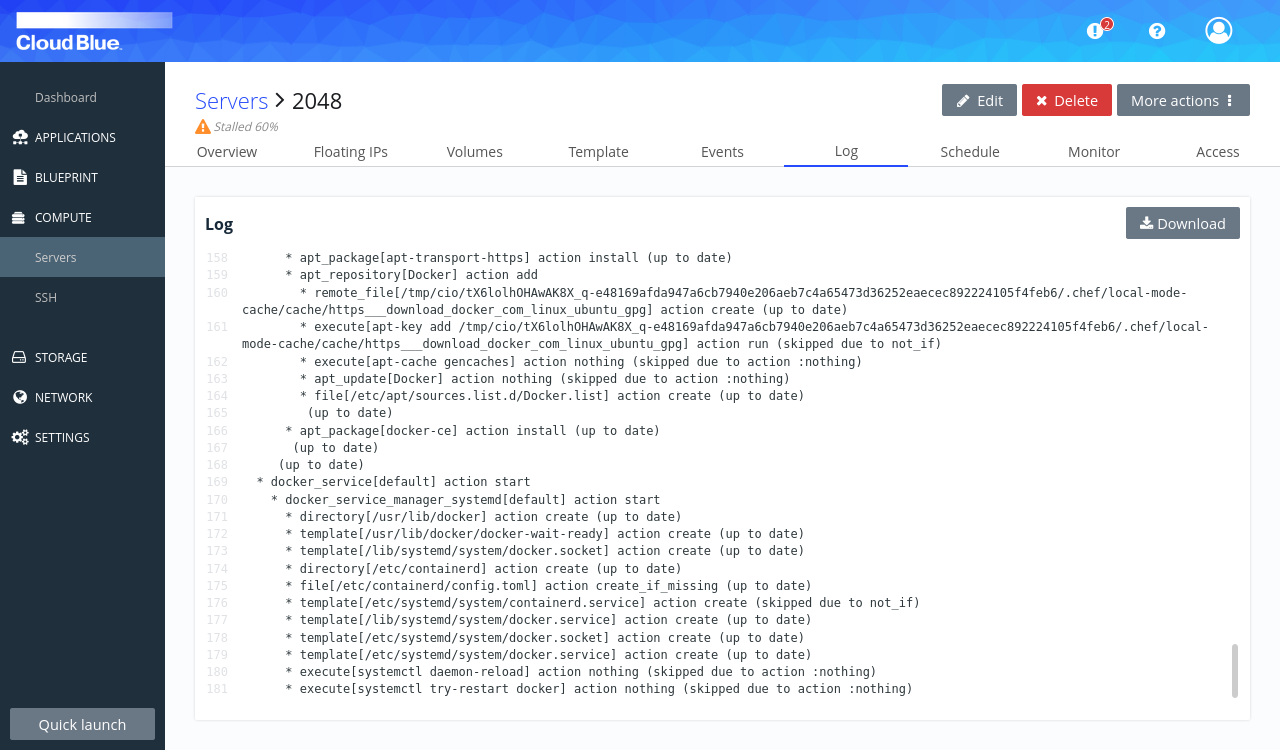
- Then go to the Log tab to show the software configuration progress.
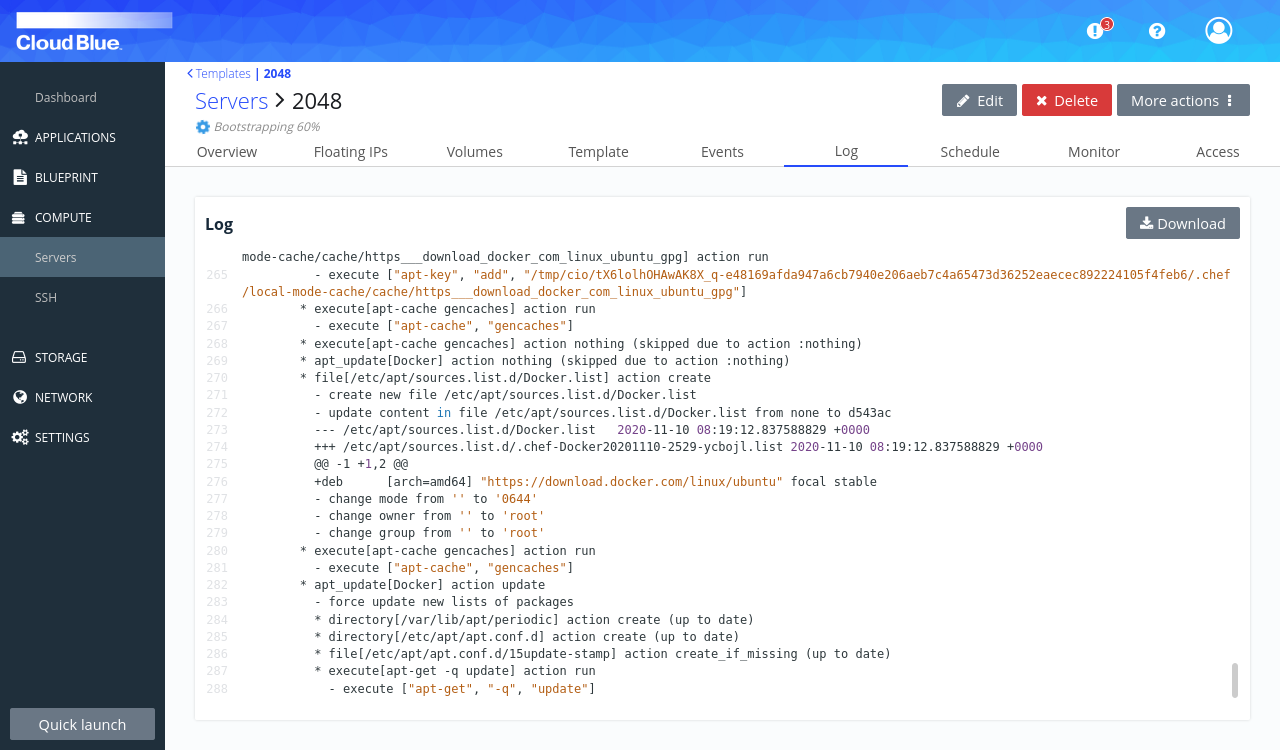
- When the software configuration finishes without errors the server ends up in an operational state. In this example, however, a typo was introduced in the configuration attributes and it should end in the stalled state.
Debugging and fixing software configuration errors
When a server fails to proceed from the bootstrapping state to the operational one, chances are there was some problem with one of the cookbooks or attributes. The logs of the software configuration process can give you the clue.
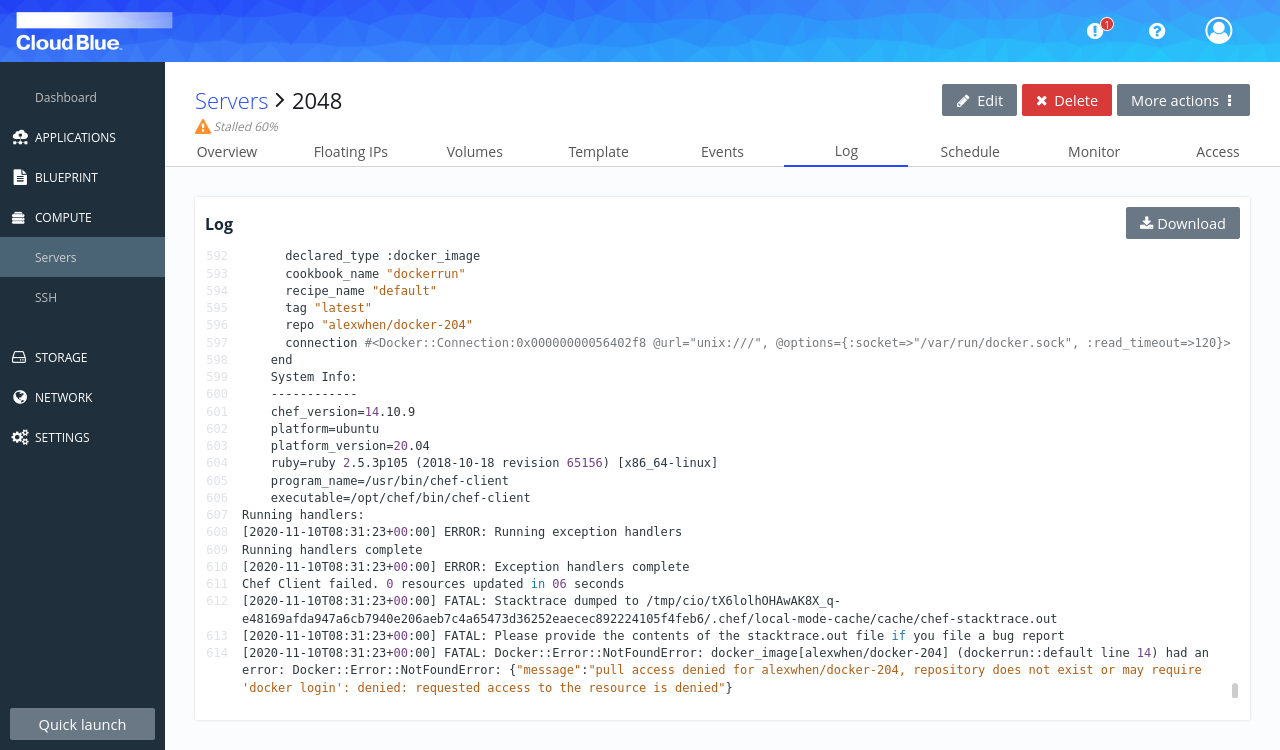
In this example, a typo was introduced in the
dockerrun/imageconfiguration attribute, and this is revealed by the following line:{"message":"pull access denied for alexwhen/docker-204, repository does not exist or may require 'docker login': denied: requested access to the resource is denied"}The correct value for the
dockerrun/imageconfiguration attribute isalexwhen/docker-2048. You are going to fix it on the template and then the server will have its configuration automatically reapplied. Go to the Overview tab of the server and click on the name of the template to access it.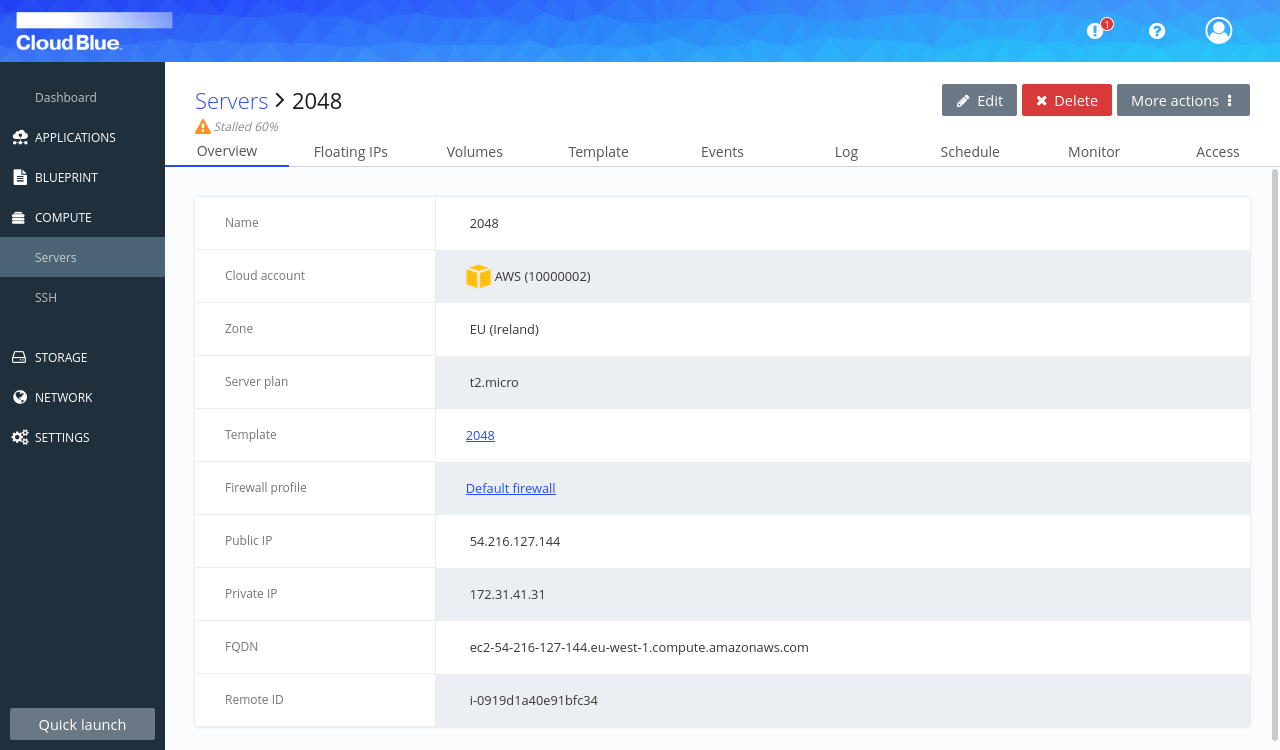
Go to the Cookbooks tab.
Press the "Edit" button on the Attributes section. This will open an edit form just for the attributes. Expand the attributes tree and change the dockerrun/image value to
alexwhen/docker-2048.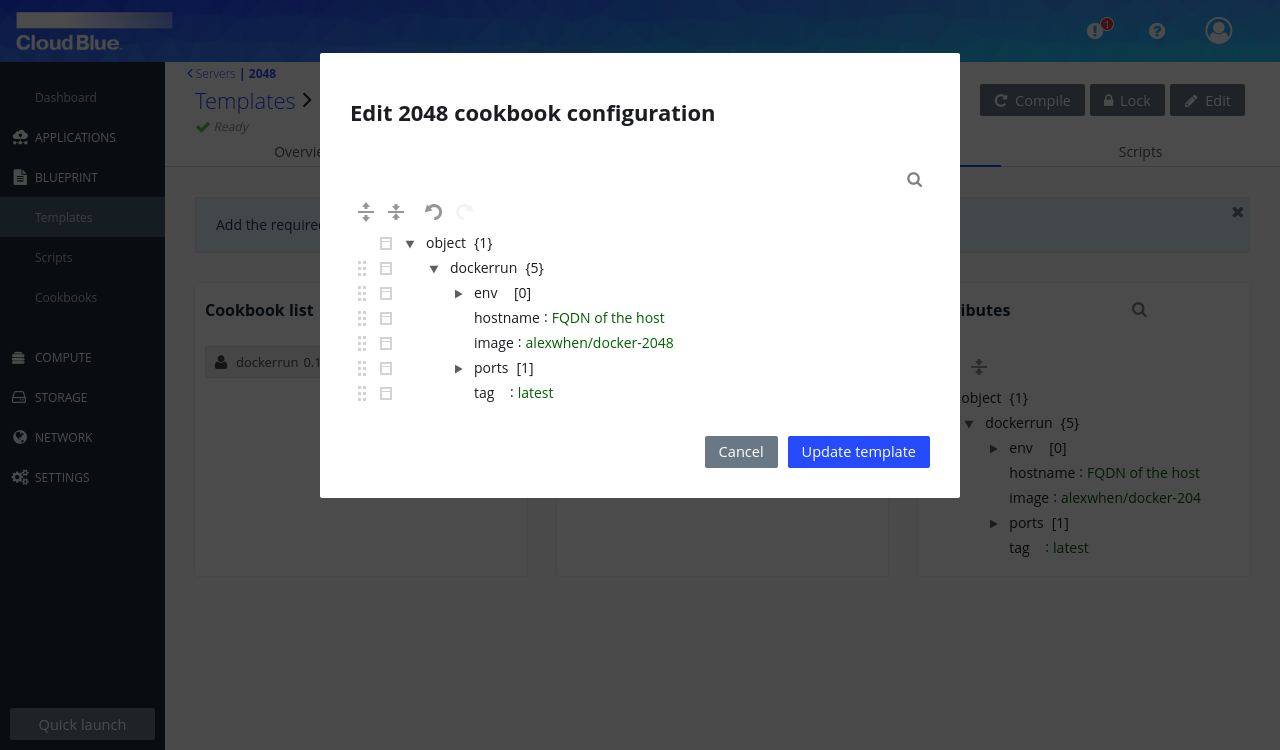
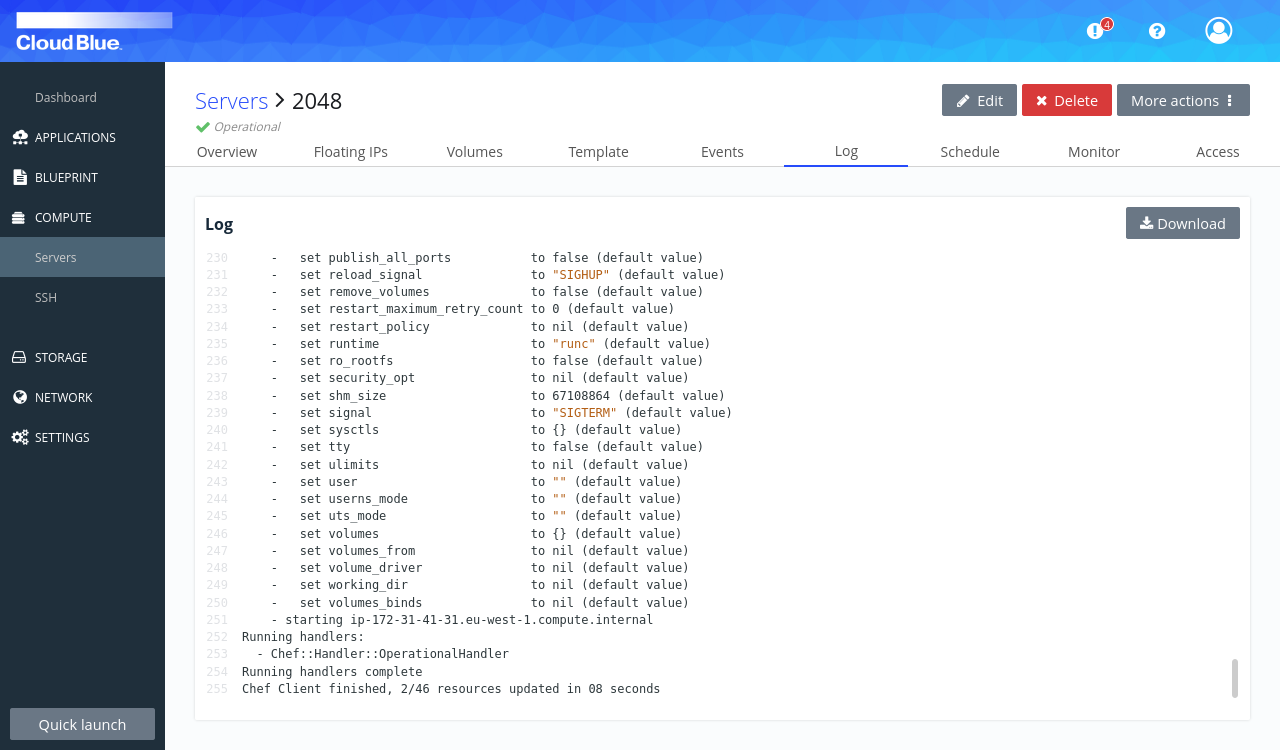
Press the "Update Template" button. Then go back to your server by clicking on the Servers tab and then on your server's name. Then proceed to the Logs tab and wait for the software configuration to run again. This may take up to 15 minutes.
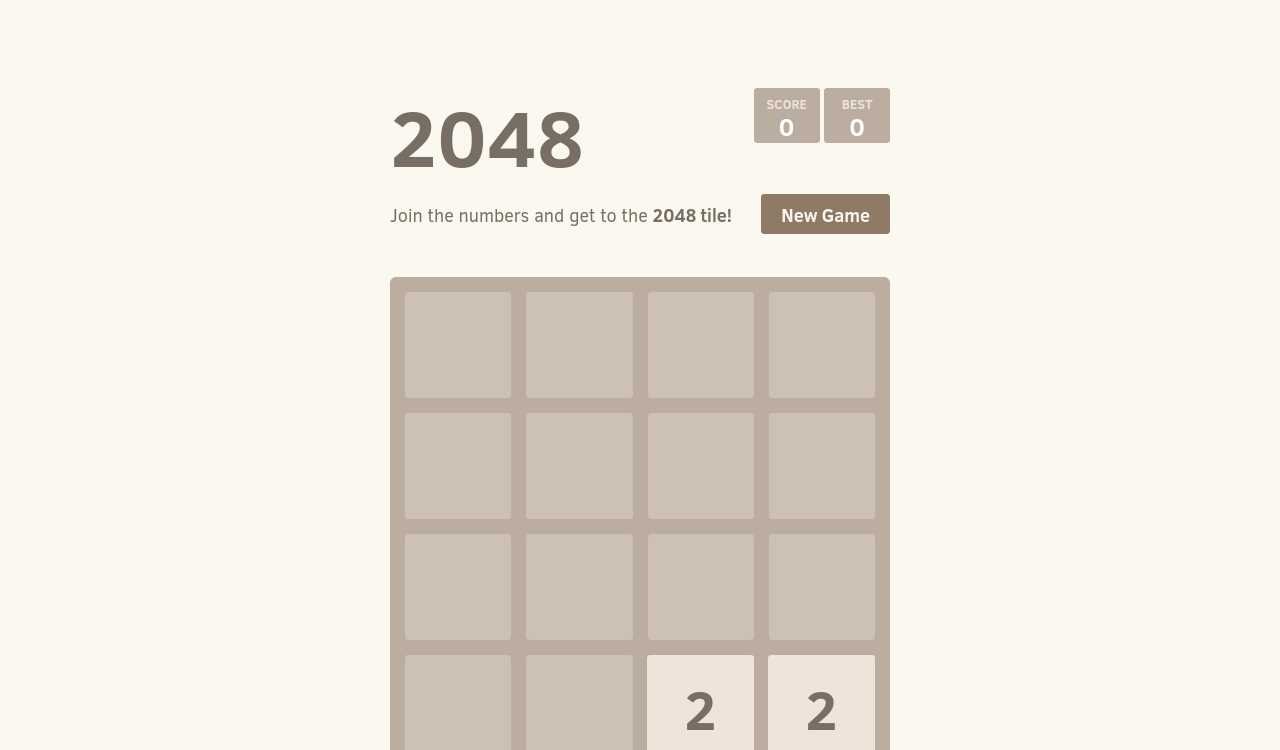
This time it should be successful and some time after it finishes the server should proceed to the operational state.
Go to the Overview tab and copy the Public IP of the server.

Paste it on your browser's URL bar and you should see the 2048 game you just deployed as a container on your server.