Configure an Instant-WVD Deployment
This guide will explain, how to configure an Instant-WVD (Windows Virtual Desktop) deployment, and what to do in case you want to cancel it.
Prerequisite: You have bought an Instant-WVD deployment in the marketplace and it has been deployed successfully.
- Configure Active Directory users and install AD Connect
- Add permission to application group to WVD users
- Create "Run As Account" (for autoscaling to work)
- Use
- Cancellation
- Additional resources
Configure Active Directory users and install AD Connect
Prerequisite: Make sure you have a user with "global administrator" role in your Azure Active Directory.
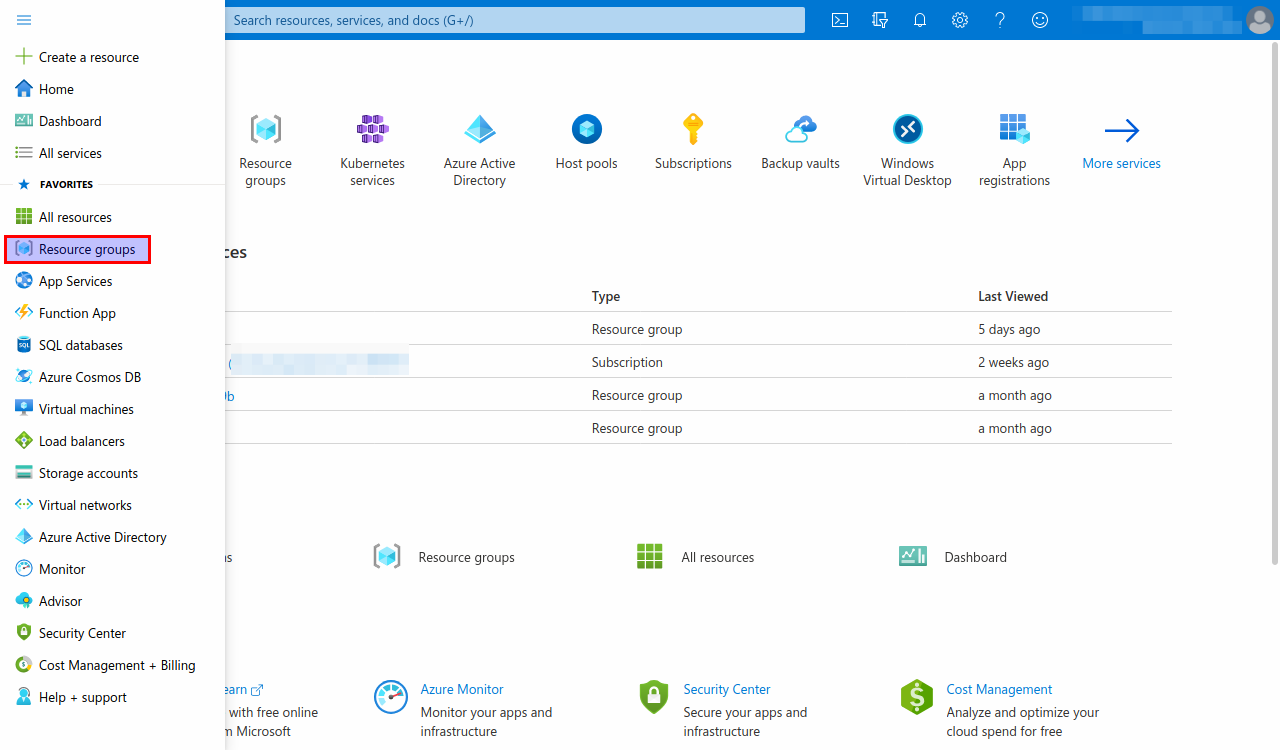
- Enter into your Azure portal
- Go to the resource groups view
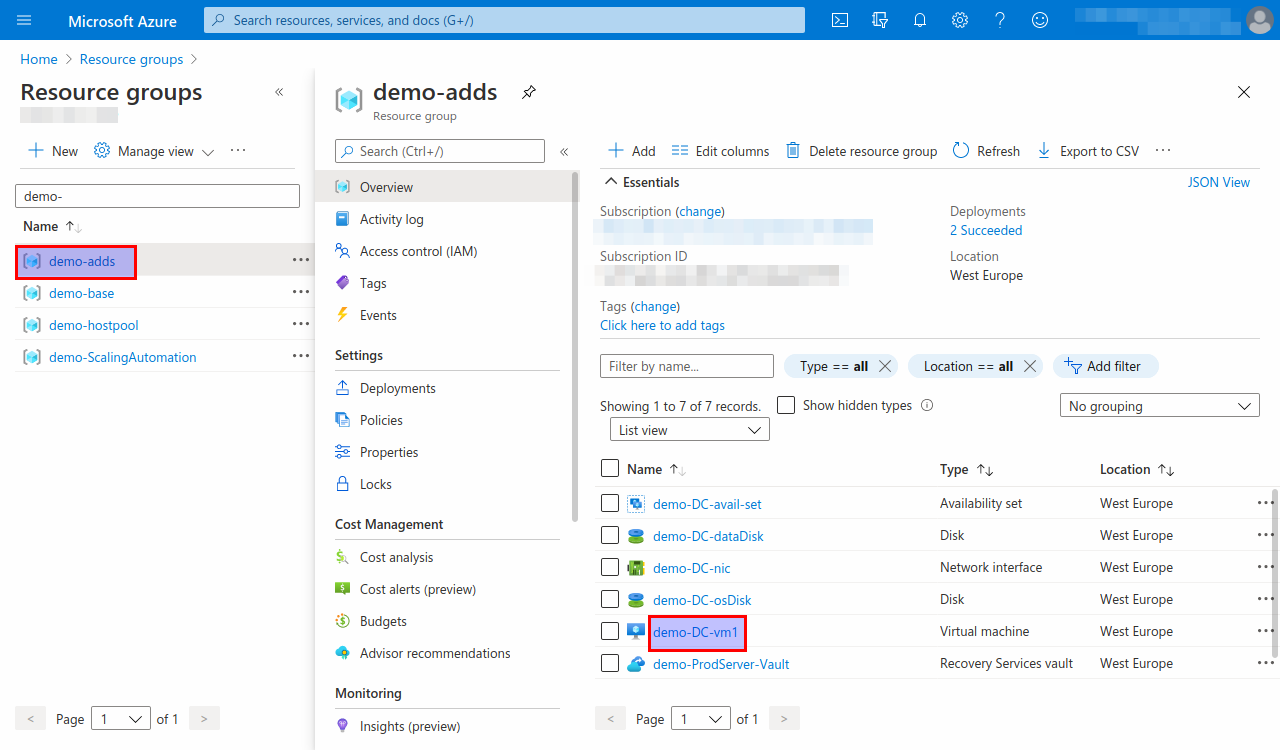
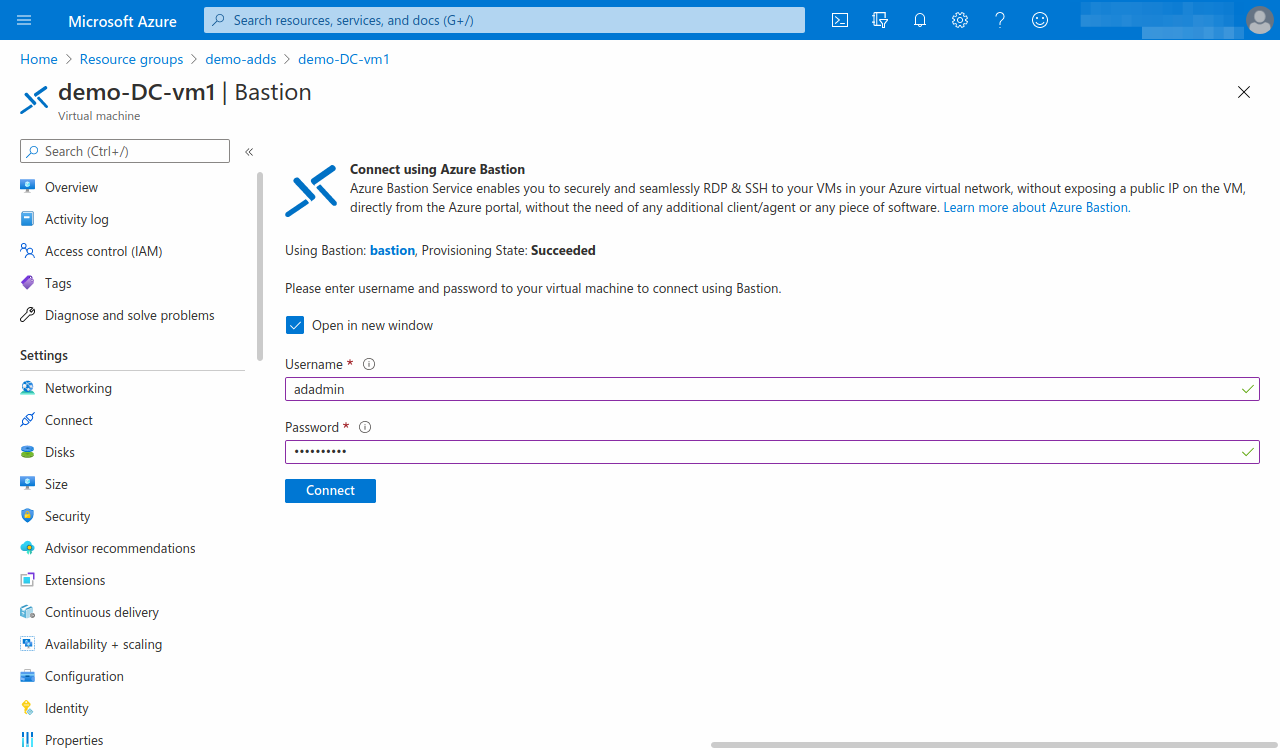
- Open the ADDS resource group and the resource of type "Virtual Machine".
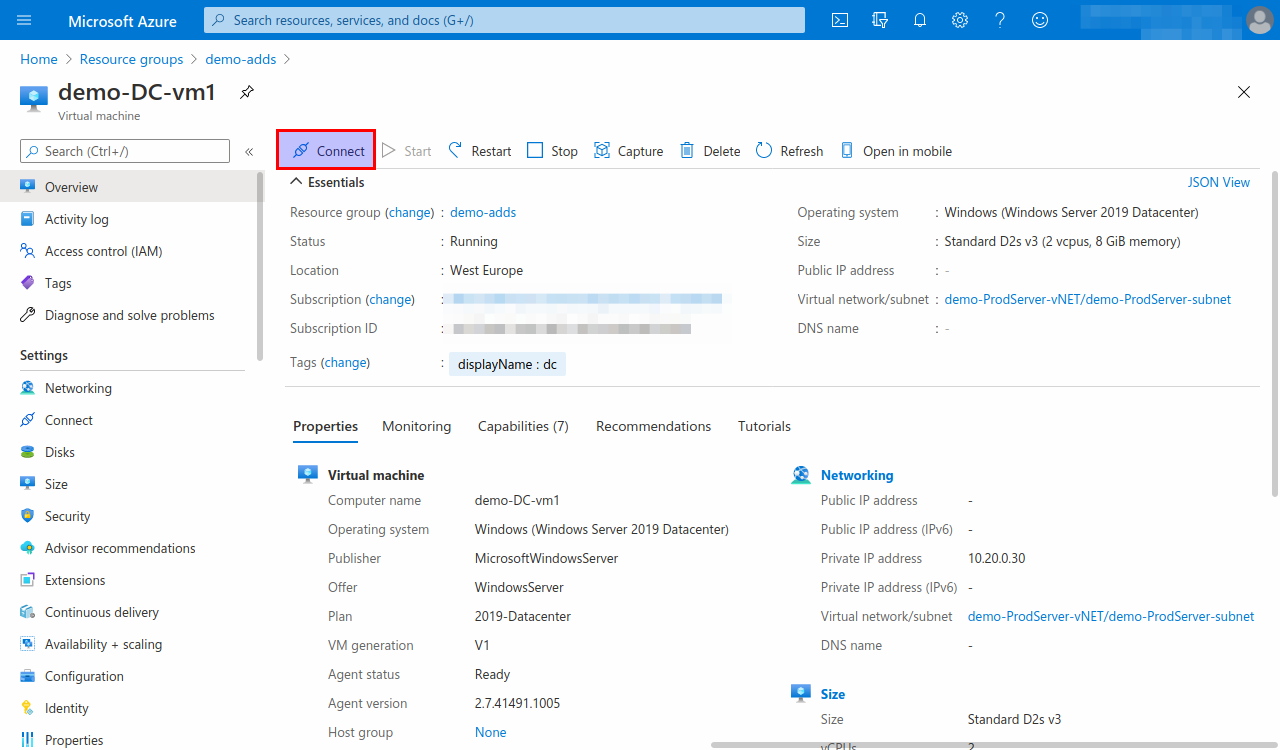
- Select: "Connect", and connect through "Bastion"
- Enter the AD domain username and the password that you specified during ordering. This will give you access to the Active Directory Domain Controller (ADDC).
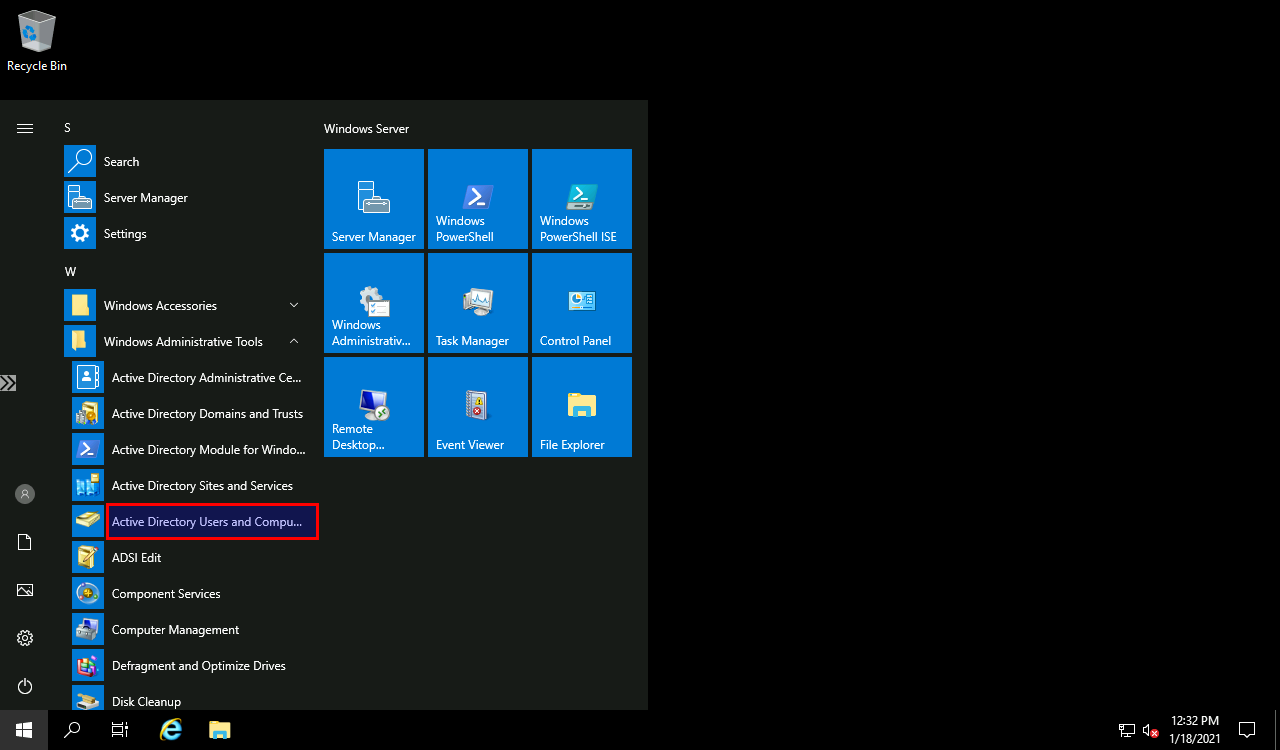
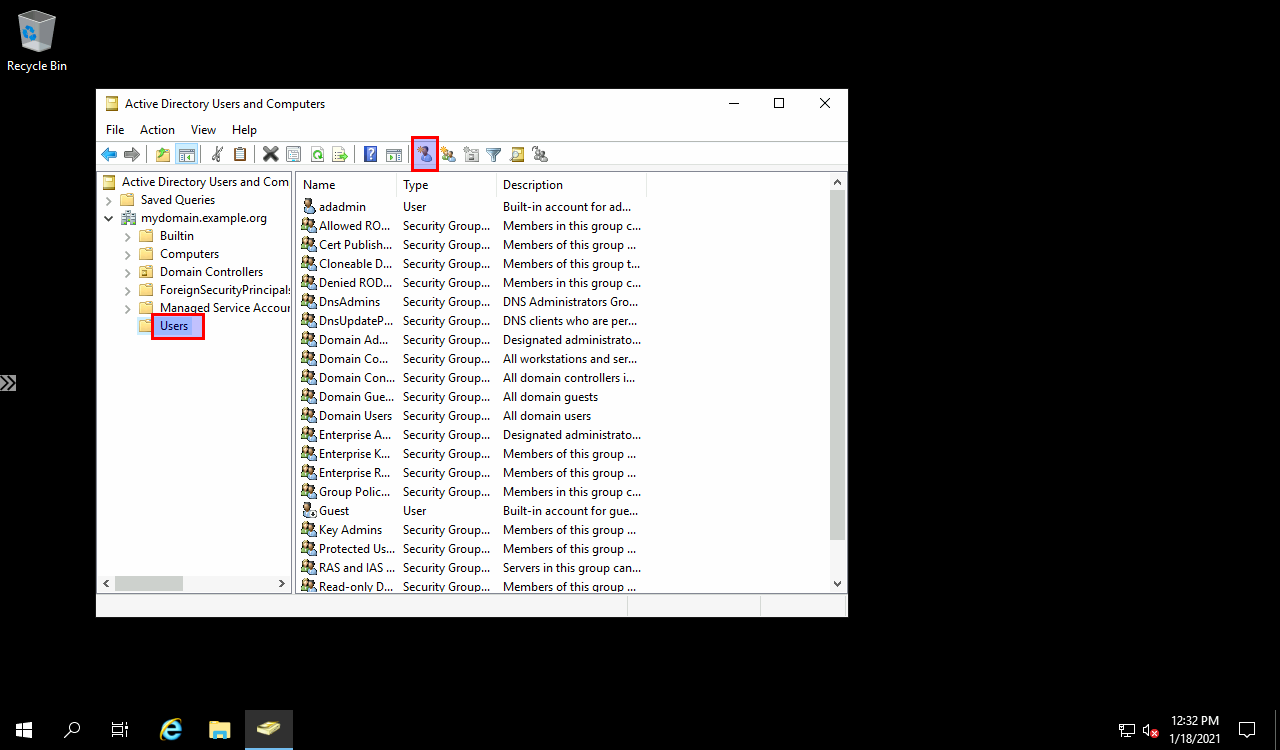
- On the ADDC server, open the "Active Directory Users and Computers" management application.
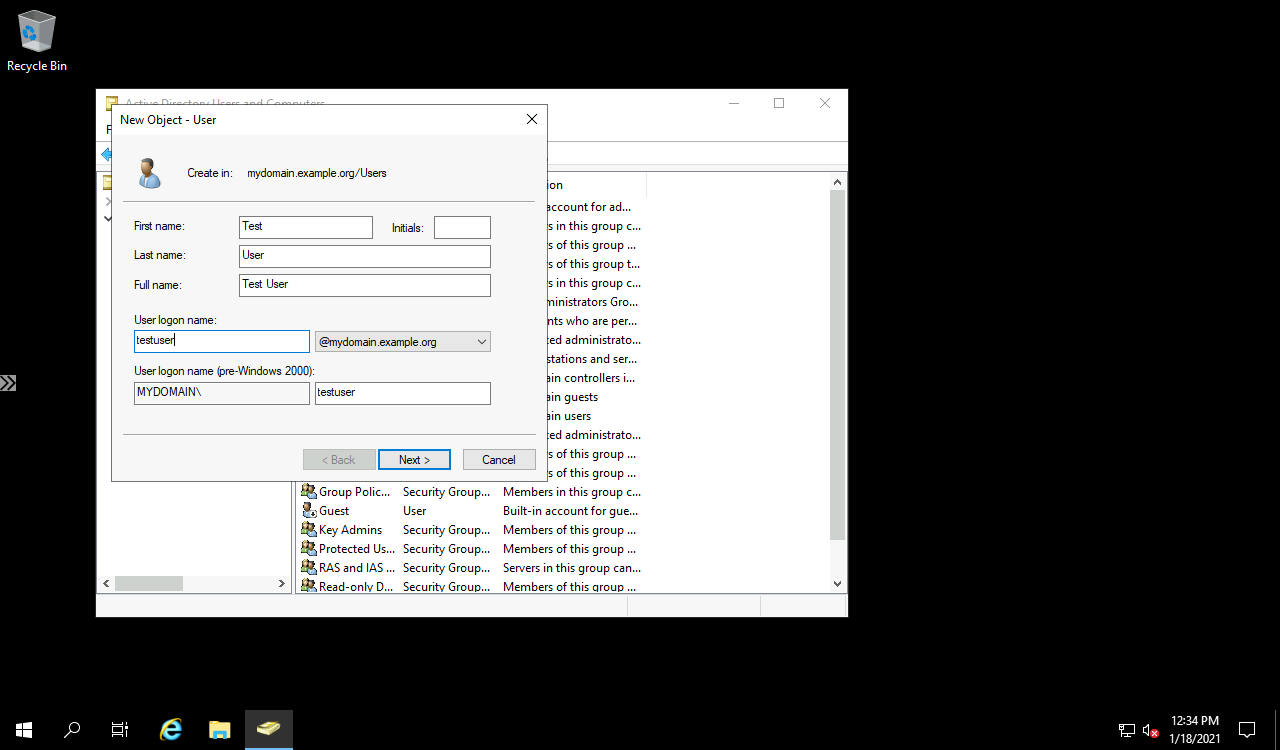
- Add the users you want to connect to WVD.
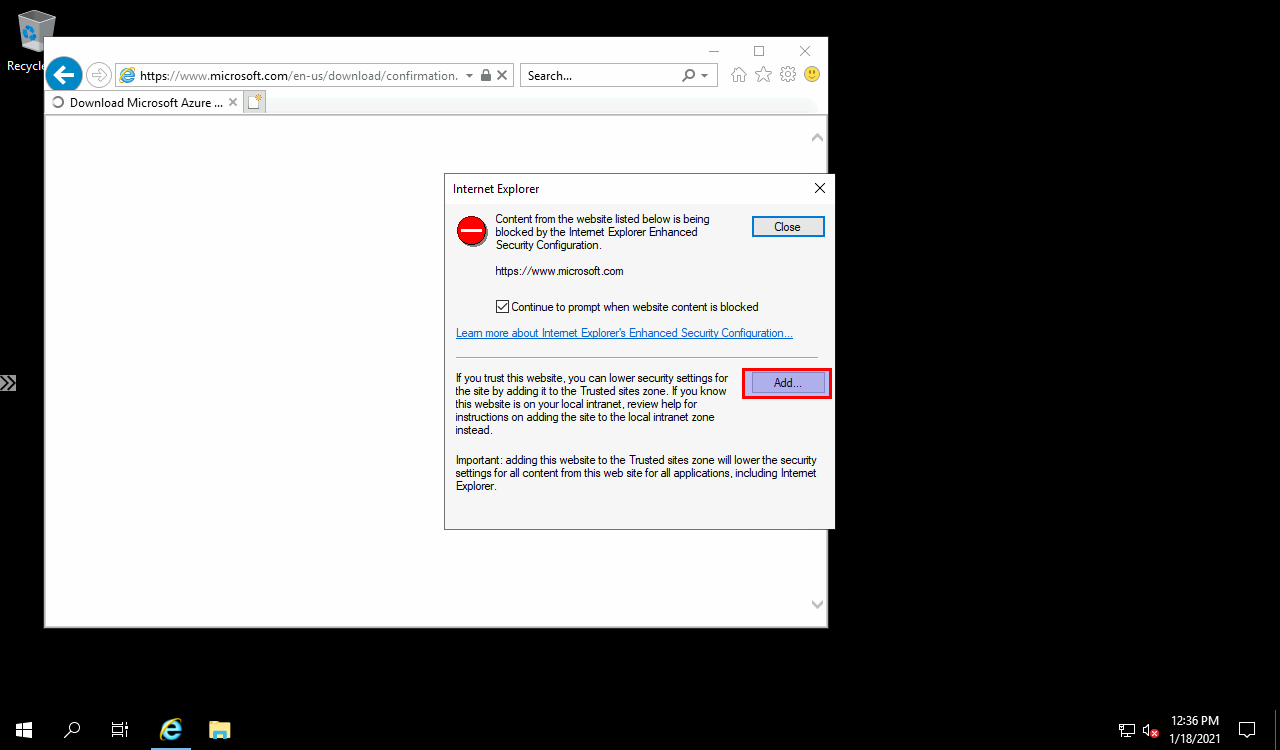
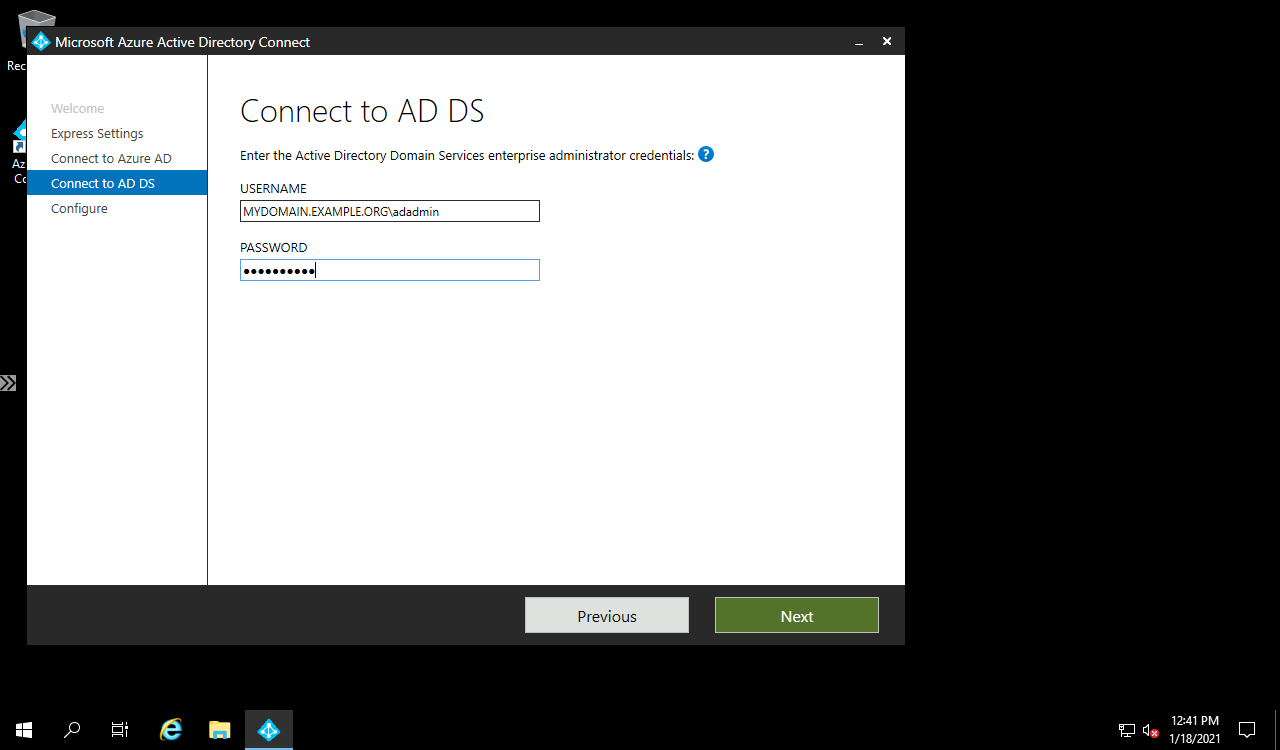
- Open the Internet Explorer and go to the Azure AD Connect download page: https://www.microsoft.com/en-us/download/confirmation.aspx?id=47594. Add the requested sites to the trusted sites.
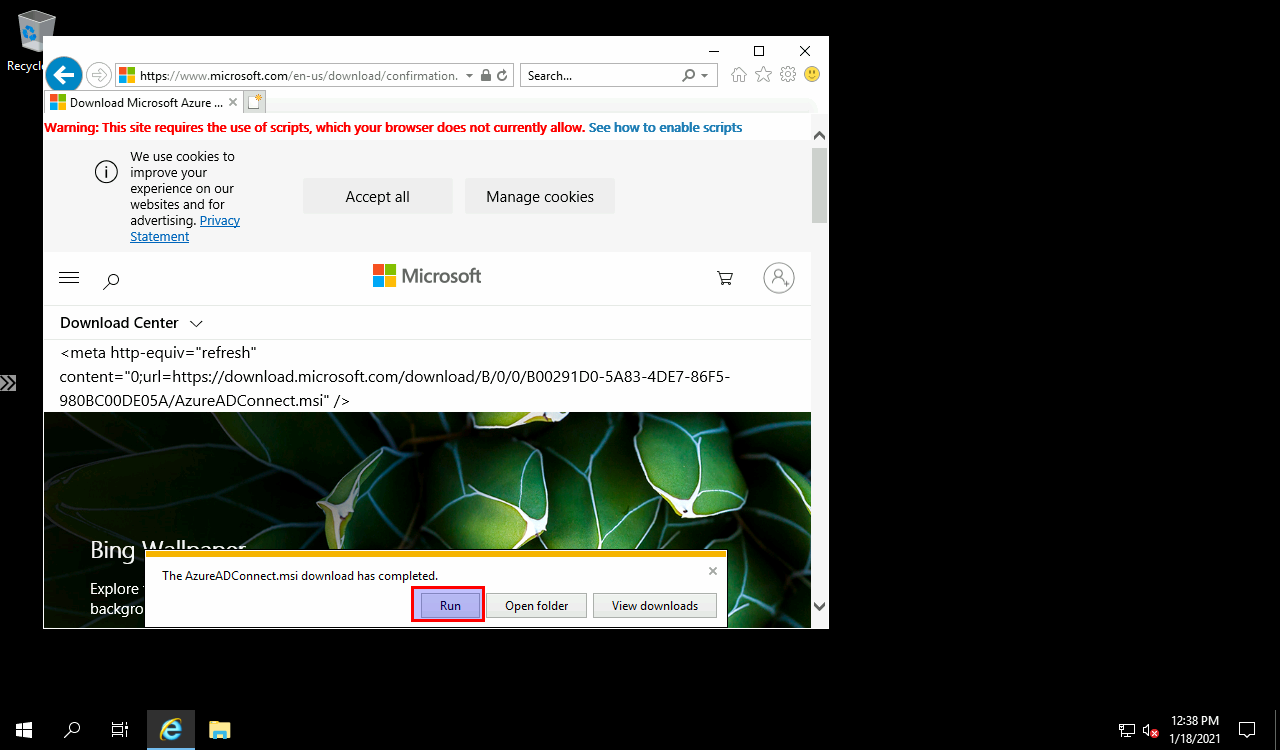
- Save and and run the installer.
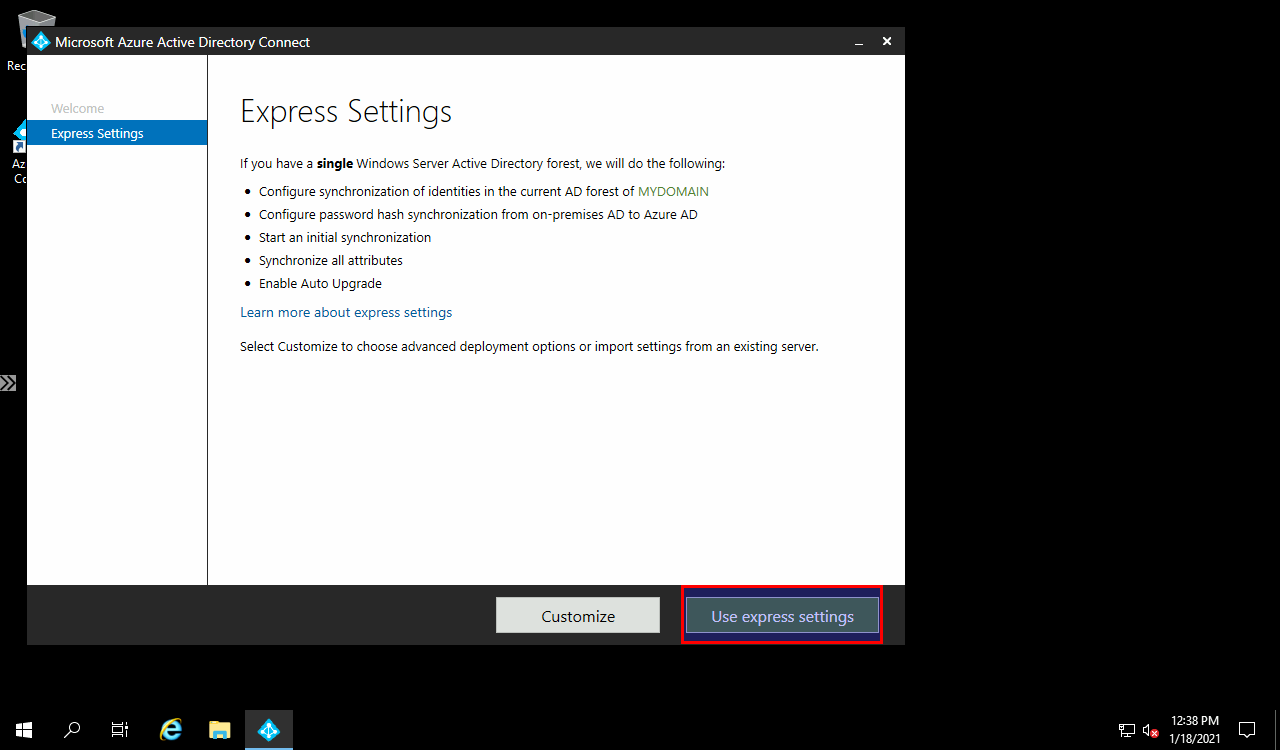
- Use Express Settings (or customize, if you need to).
- Enter your Azure AD global administrator credentials
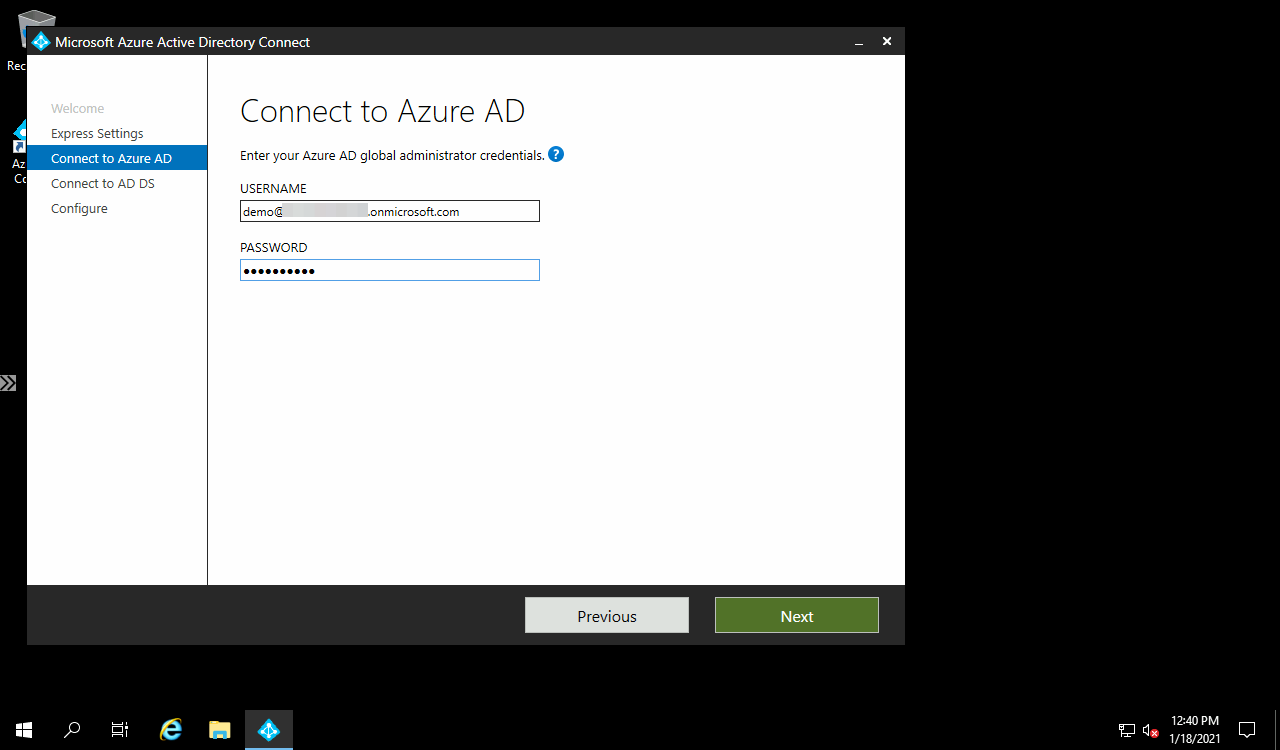
- Enter the AD domain username prefixed by the AD domain name and the corresponding password that you chose during ordering and continue the installation.
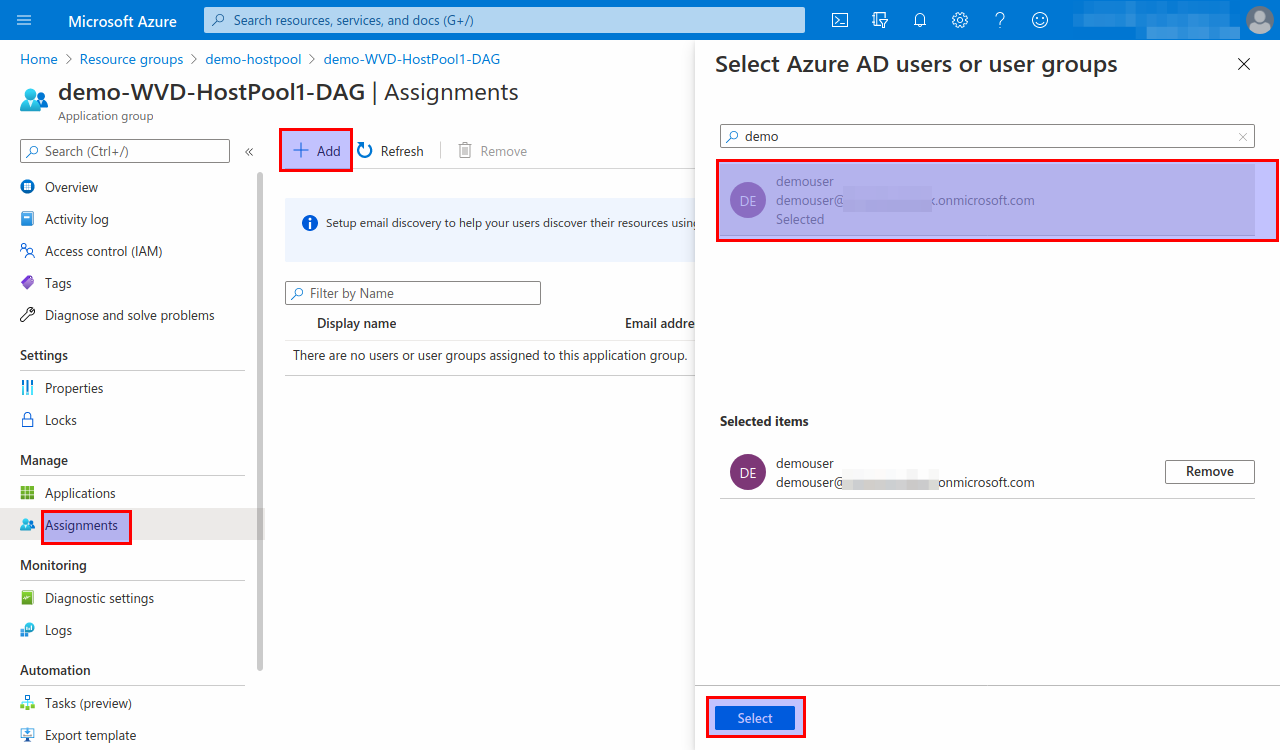
Add permission to application group to WVD users
- In the resource group view, open the hostpool resource group and select the resource of type Hostpool

- Assign permission to the application group to all WVD users
Create "Run As Account" (for autoscaling to work)
In order to the autoscaling job to work properly a RunAsAccount must be created in the autoscaling Automation Account:
- In the resource group view, open the scaling resource group and select the resource of type "Automation Account"
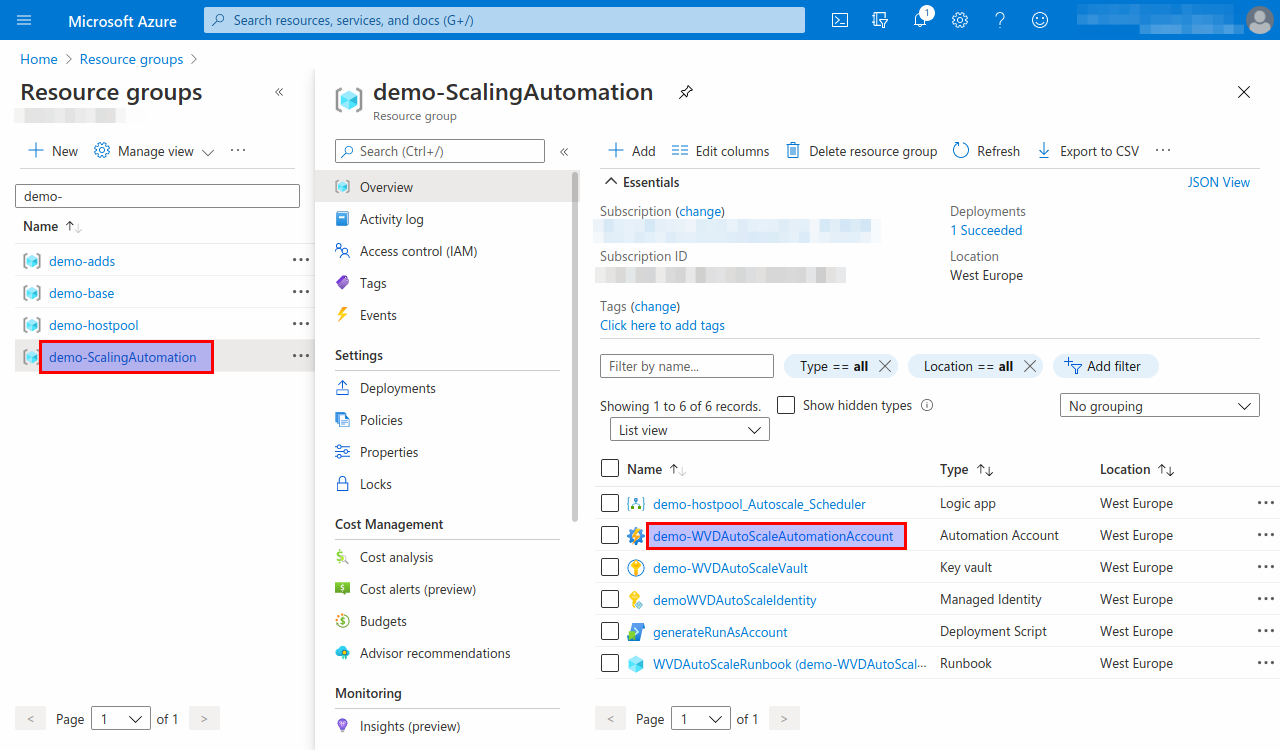
- Create a Run As account.

Use
Once autoscaling started, you are ready to connect to the host pool.
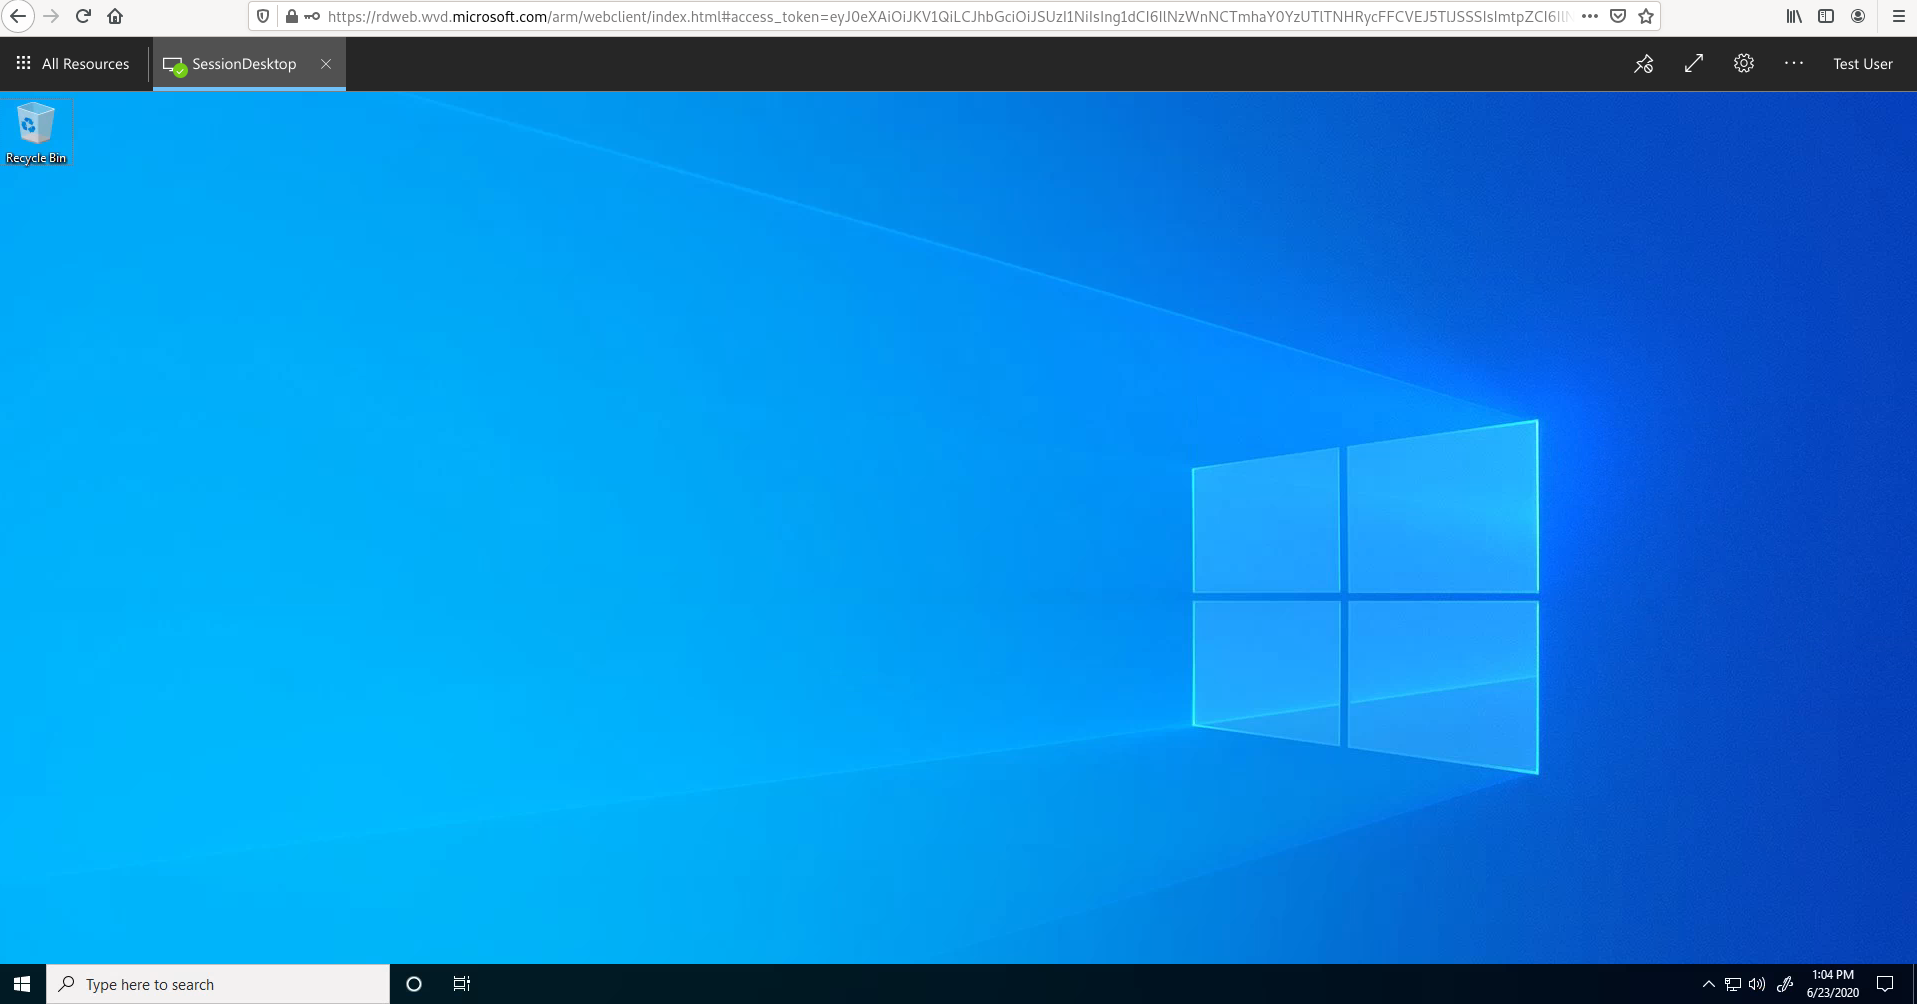
To connect to WVD with the users you created in the active directory, use:
- Log into WVD with your WVD user (using WVD user with domain name)
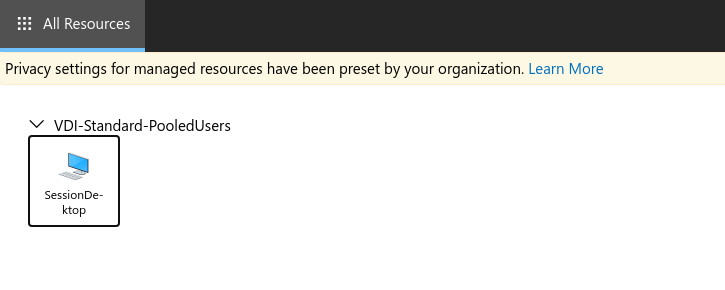
- Click on SessionDesktop to start a remote session (use WVD username without domain name).
Cancellation
Before cancelling the subscription, do not forget that you have to
All of this has to be done manually in the Azure portal. Otherwise, the other resources cannot get deleted, although the subscription has been cancelled.
Delete the backup items
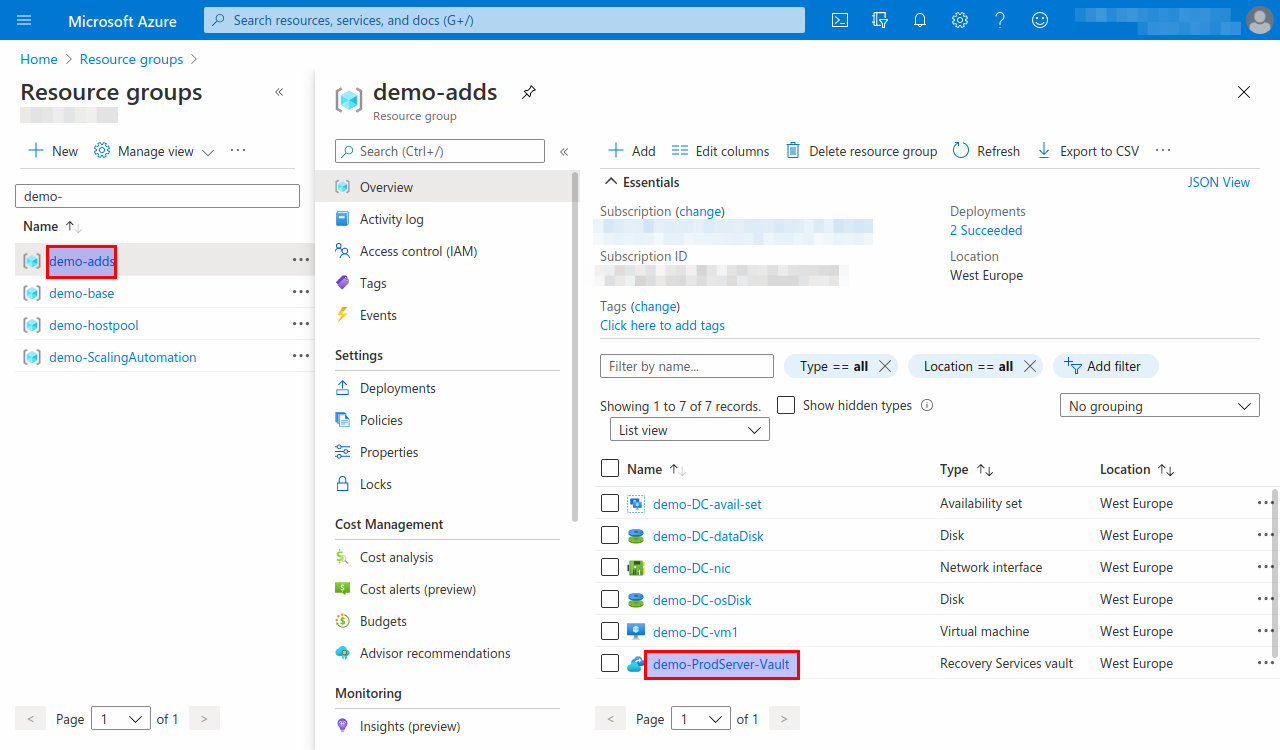
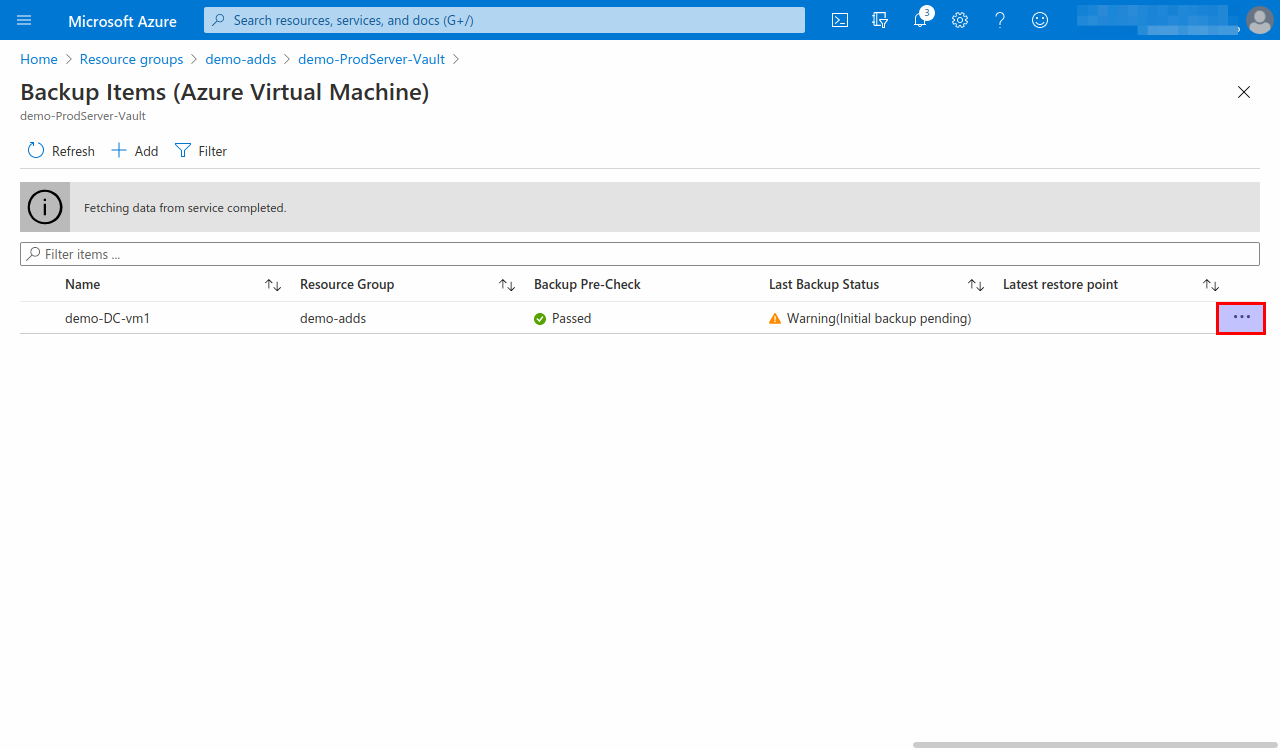
- Open the ADDS resource group and click the resource of type "Recovery Services Vault"
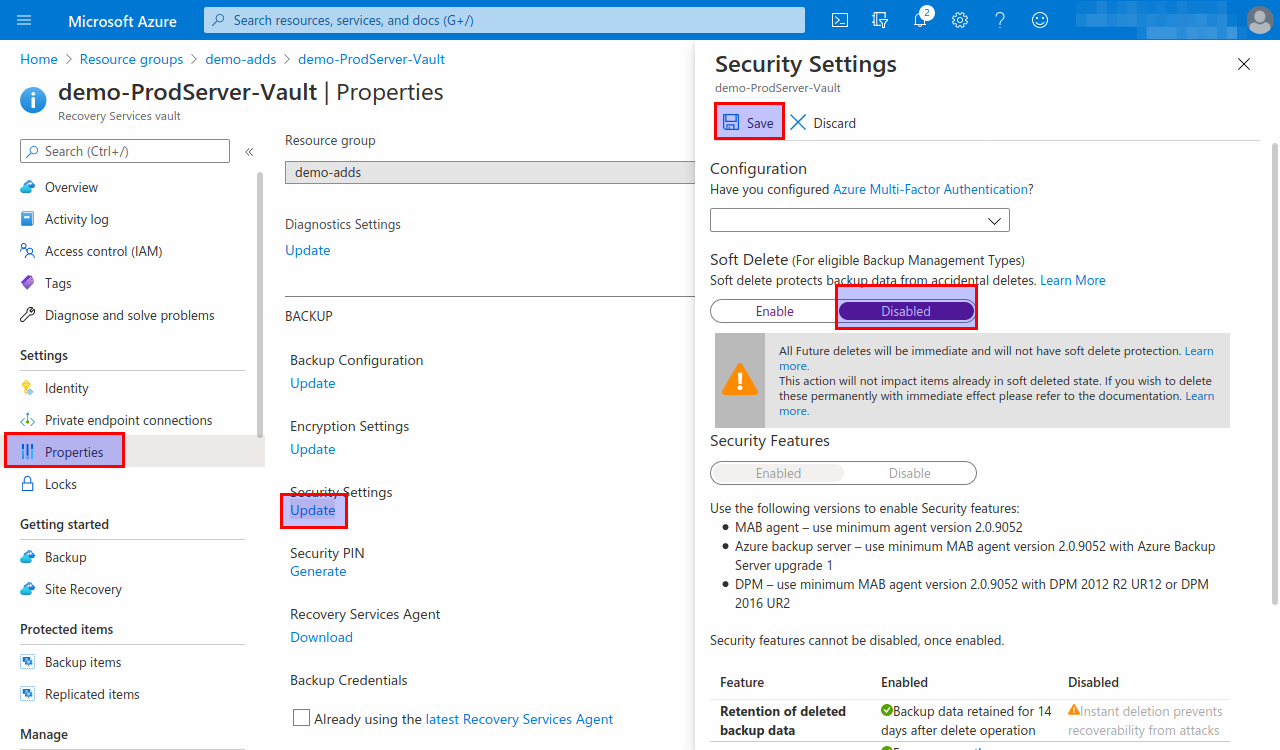
- Select Properties / Security Settings and disable soft-delete
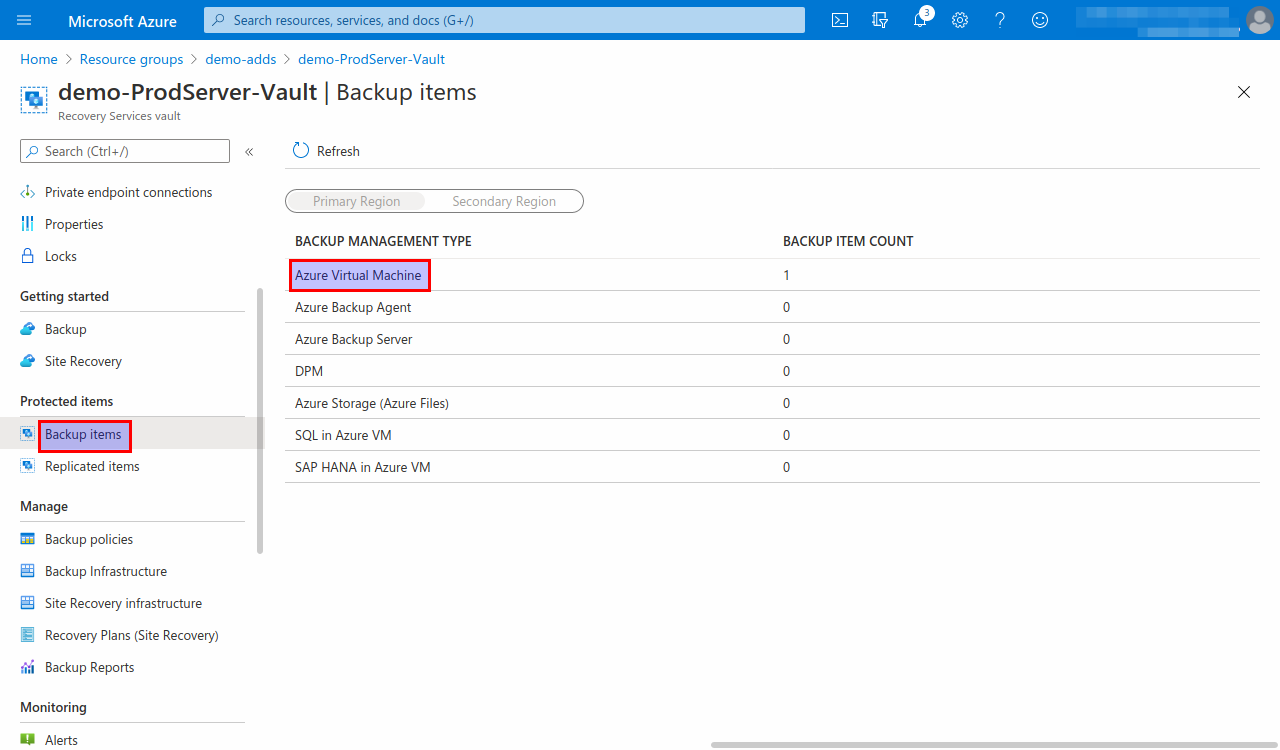
- Select Backup items and select the Virtual Machine
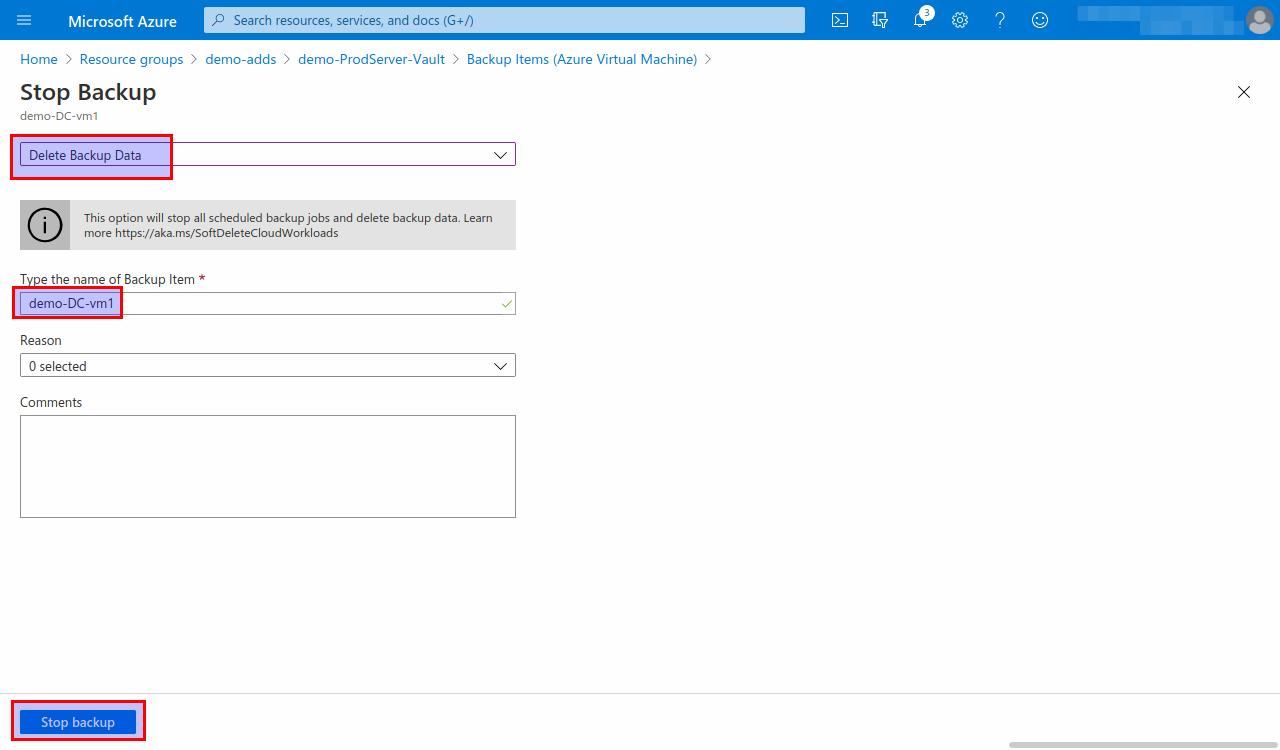
- Stop the backup
- Delete the backup items
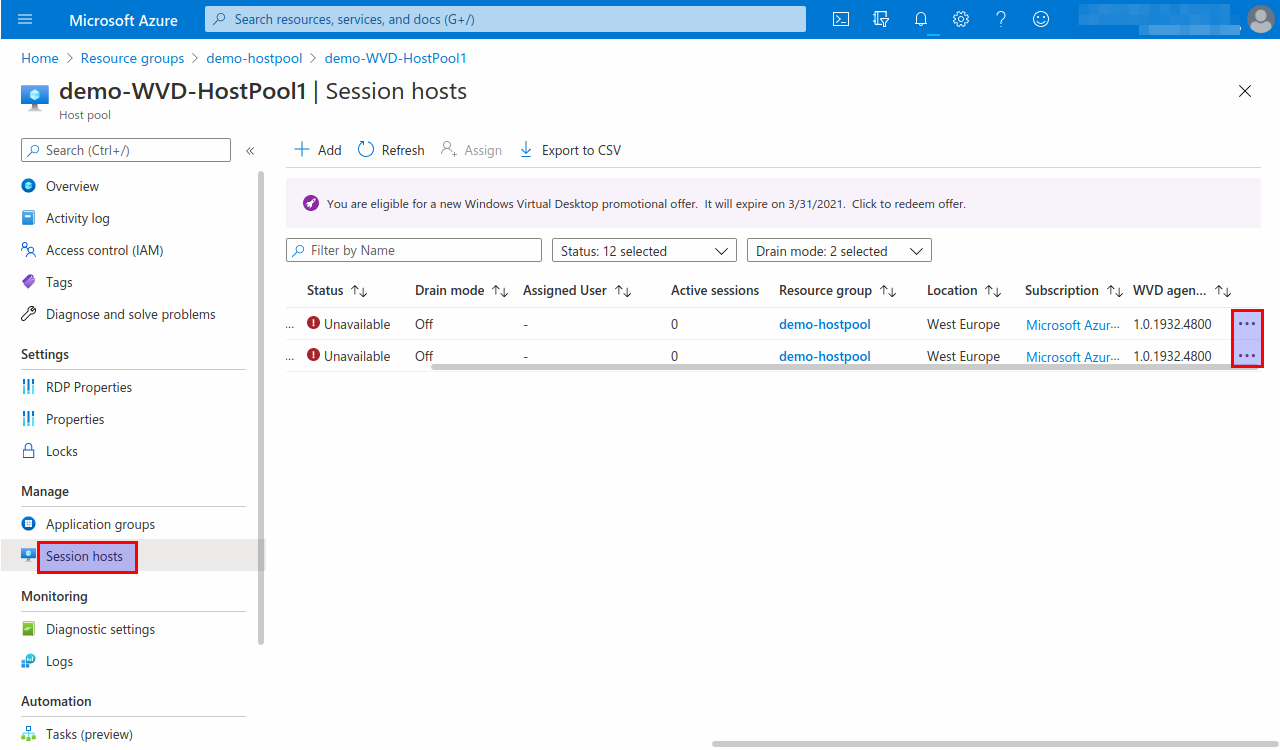
Deassign the Virtual Machines from the host pool
- In the resource group view, open the hostpool resource group and select the resource of type "Hostpool"
- Delete the virtual machines from the host pool.